Pages

February 27, 2014

Liquorice cream caramels


After I cracked the code of making cream caramels, which are not having a fluid structure (Valentine Day Cream Caramel) and I noticed how fast these caramels disappeared into mouth, I have been thinking about making liquorice cream caramels.

Therefore I have been on a small sight-seeing tour on the Internet looking at various recipes on liquorice caramels. Here I noticed, that the level of liquorice in my opinion was on the low side. I mean, as liquorice is part of the name, the taste should have liquorice character !!!! So I ended up with using a combination of sweet liquorice syrup and raw liquorice.

Based on feed-back from various tasters, I will see, if I should stick the amount or if it should increased or decreased. I can see the worried mind of my good girl friend in Horsens, as we have different threshold for, when a liquorice is in balance or too dominating.

Sleeping cat hiding below a towel
Another thing I need to consider, when making caramels in my little kitchen, is, where is the cat ? It is not a great combination to have a cat running around in the kitchen, when you are working with this very, very warm sticky caramel mass of up to 137'C. So I need to ensure, that Hannibal the Cat is occupied hunting mice on his hunting area or sound asleep upstairs.


Liquorice Cream Caramels: - 40-50 cream toffees
  • 100 g butter
  • 200 g dairy whipping cream, 35-40% fat
  • 340 g sugar
  • 120 g light sugar syrup
  • 40 g sweet liquorice syrup
  • ½ teaspoon raw liquorice powder
  • 2 tablespoons glucose syrup
  1. Add all the ingredients into a small cooking pot.
  2. Stir continues, as the caramel mass is heated up, until the temperature reach 137'C.
  3. Fill the caramel mass into small alu- or paper-form.
  4. Place the caramels cold, until they cooled down.
  5. Store in an airtight container.

February 25, 2014

GranDining at Cafe Grand , Horsens


Snack: cockerel - vinegar dust and creamy dill
My very good friends in Horsens suggest, that we should spend a Saturday evening in some good company. Being in the company of good friends enjoying a great meal sounded as an excellent idea for me.

We met at Cafe Gran to enjoy something called "GranDining", which is all-inclusive concept known from the charter holiday. The  snack and three course menu is decided by the kitchen accompanied by a wine buffet (ad libitum) and free coffee/tea at the end. You know, when you enter the cafe, what you will end up with paying 499 DKK for food and wine regardless of how much you drink. Great concept :-)

We started off with a snack of crisp cockerel (skin ?), vinegar dust and creamy dill mayonnaise. I really like the crispness, is what like eating one big potato chips, which tasted of bacon and not chicken ! Together with the snack we were served an excellent tasting glass of pink coloured sparkling wine. Excellent combination.

Starter: coal fish with onion ad libitum
As starter we got a carefully designed plate of rimmed coal fish, onion puree, onion cream, bunt onions, dill oil and herbs. So onions was a carrying theme for this starter with plenty of taste and texture variations.


Main course: pork bone with vegetable
The main course was the favourite meat food of the Danes = pork. Blown glazed radius (the lower part of the pig leg), puffed pork rinds (which I did not located on my plate), Brussels sprouts and parsnips served a great tasting brown sauce.

I think it is the very time, that I have enjoyed radius, which turned to be very tasting. So I will not be afraid to pick this another time on a menu card.
Dessert: caramel theme


The dessert was themed around caramels in various disguise: caramel ice cream (which was not frozen enough in my opinion), coffee meringue (perfect taste of coffee), panna cotta (very cream with a refreshing taste twist of lemon) and tiny pieces of caramels. A very tasty dot to a great meal.

During the entire meal you could and some more glass of wine. You could choose between two white and two red wines, good quality wine, and there was plenty of wine during the entire evening.

I really like this all-inclusive concept as both food and wine were of great quality. As mentioned previously I paid 499 DKK (= 66 €) for both food, wine and tea. So it really value for money to participate in this GranDining. And it is not the last time, that I will enjoying GranDining. Hopefully I can find a driver next time, so I really can enjoy wine ad libitum part of the meal !!!

PS: as tradition "demands" fingers and eating equipment are a part of most of the picture, when eating together with my good friends in Horsens :-)

February 23, 2014

Speculoos Shrovetide Bun


One week to go !!!

Next Sunday is Shrove Sunday and the keep time for Shrovetide buns. 

So to celebrate this season of Shrovetide buns I have been on the look out for some new recipes. 

I decided to use the bun dough from Frøken Annes køkken på fastelavnsboller 2014 with a filling of Speculoos paste from Belgium and to decorate the icing sugar with Speculoos cookie crumble.

I find the bun dough to quiet fatty to work with, therefore I rolled in bed of flour = using plenty of flour below and top of the dough, so it would not stick to much to the surface of my kitchen table.

I must admit, that this specific recipe on a bun dough is not going to a favourite of mine, when I am baking Shrovetide buns or buns in general. Using Speculoos paste is bringing uniqueness to Shrovetide buns instead of the more traditional cream filling or mixture with marzipan.


Speculoos Shrovetide Bun: - 15 buns

  • 200 g milk
  • 50 g yeast
  • 3 eggs
  • 3 tablespoons sugar
  • 1 teaspoon cardamon
  • nip of salt
  • 250 g butter - diced inn smaller lumps
  • 450 g wheat flour
  • Speculoos paste
  • icing sugar
  • Speculoos cookie crumble
  1. Add milk, yeast, eggs, sugar, cardamon, salt and butter into the mixing bowl. Let is stand for 30 minutes at room temperature.
  2. Add the flour into the mixing bowl.
  3. Knead everything together using the dough hook on a kitchen mixer on speed 2 for 2 minutes.
  4. Let the dough raise for 30 minutes.
  5. Roll the dough in a bed of flour into a square with a height of ½ cm in a size of 50 x 30 cm
  6. Cut the the dough into squares of 10 x 10 cm
  7. Add the Specullos paste into the middle of the dough square
  8. Fold the dough together around the filling - fold it close together
  9. Place the bun up-side-down on the baking plate
  10. Raise the buns for another 30 minutes
  11. Heat the (conventional) oven to 200'C
  12. Glaze the buns with milk
  13. Bake at 200'C for 20 minutes in the middle of the oven (conventional)
  14. Cool down the buns before decoration with sugar icing and Speculoos cookie crumble.

February 22, 2014

Winter Pot


During the Winter season you can sometime need a hot and warming meal to keep your warm during some cold and windy Winter days.

The dish is an easy meal to cook and prepare including making a bigger portion for some easy meals during busy week days.

Winter Pot: - 4 servings

  • 400 g minced beef meat
  • 1-2 tablespoon olive oil
  • 2 x 400 g canned minced tomatoes
  • 200 ml water
  • 1 x 200 g canned maize
  • 1 red pepper fruit - chopped into squares
  • 1 green pepper fruit - chopped into squares
  • 1 onion - chopped
  • 250 g mushrooms - chopped in quarters
  • 250-300 g cocktail sausages
  • 2 cloves of garlic
  • starch for viscosity adjustment
  • salt and pepper for seasoning
  • rice
  1. Fry the beef meat, onion and garlic in the hot olive oil.
  2. After frying add into the pepper fruit squares and mushrooms. Fry for another 2 minutes.
  3. Add in the canned tomatoes and water.
  4. Bring the dish to the boiling point.
  5. Add in the starch and maize.
  6. Finally add in the cocktail sausages. 
  7. Let the entire dish boil gentle for 4 minutes.
  8. Season with salt and pepper.
  9. Serve this Winter Pot with boiled rice.

February 21, 2014

Knitted neck tube a la Søhesten


Last Winter I survived some very cold and icy weather with this knitted neck tube safely located around my neck. The brilliant thing about a neck tube is, that you can not loose it like you can loose a scarf being grab by wind. A neck can either keep your neck warm or it can cover both your neck and head, if the wind is too cold for your ears.

This neck tube is knitted in a relative simple pattern, but it is not fool proof, as the pattern is shifting on every second pin. After some search on the Internet, I found the recipe here: Søhestens halsedisse.

I used some warm, soft 100% wool for my neck tube, which is not scratching my skin.


February 20, 2014

Orange scones


Winter time is season for all types of citrus fruit, so I decided to make some orange scones using this recipe on saffron scones as starting point.

These scones had a fantastic taste of orange and buttery texture.

To remain within the citrus theme I served these scones together with blood orange curd.Well I did not drink orange tea to these scones, instead of I enjoyed a nice cup of spicy chocolate Kusmi tea :-)

Orange scones: - 6-7 pieces
  • 450 g wheat (cake) flour flour
  • ½ teaspoon salt
  • 1½ teaspoon baking powder
  • 60 g sugar
  • 125 g cold butter
  • 1 blood orange - zest and juice 
  • 1 teaspoon of orange flower extract
  • 1 egg
  • 140 g milk
  1. Heat the oven (conventional) to 250'C.
  2. Mix the flour, salt, orange zest, baking powder and sugar together in a mixing bowl.
  3. Cut the cold butter into small pieces.
  4. Grind the butter pieces into the flour mix.
  5. Mix the orange juice, orange flower extract, milk and egg together.
  6. Add the juice-milk and egg without kneading into a dough.
  7. Place the dough on a pieces of baking paper.
  8. Flatten the dough into a height of 3 cm.
  9. Use a glass to cut out scone pieces.
  10. Bake the scone at 250'C for 12-15 minutes.

February 18, 2014

Dinner at Ainoo, Helsinki


In January I went on a business trip to Helsinki, Finland accompanied by a Greenlandic seal and a Russian silver fox to keep me warm during daytime temperature of  between -10'C and -15'C. Well, it is not that cold, when it is not windy as it is most of the time here in Denmark, where +4'C due to the wind feels like -10'C. Another good thing about travelling during the Winter period in the Nordic region is, that the traffic neither on land nor in the air is collapsing due to snow, ice or just low temperature !!!

One evening I went out to look at some of the wonderful design shops located in Helsinki as well as to find an interesting place to eat instead of at the hotel. And here I passed by Restaurant Aino located in the city centre. Quiet unusual all the guests eating here were females !!!

As starter I choose to have blinis served together with mushroom salad and with melted butter poured on top of the blinis. Apparently the season from mid January to beginning of March is referred to a blinis season in Finland, as the very cold Winter weather demands a high calorie intake fitting very well eating blinis served with melted butter. Good size of a nice crispy blinis.

As main course I was not in doubt at all, when I eat game, so here I choose reindeer fillet with port wine sauce, potato cake and cep mushrooms. I just love to eat Bambi !!! Excellent taste and the texture of the reindeer fillet was so soft, that you could chew with your eye lashes.

In total I ended to with paying approx 65 € for food and 1 glass of white wine. I will give this meal 5 stars combined with a return next time I am in Helsinki.

February 16, 2014

Soup with cauliflower and potatoes


Whenever I get cauliflower in my weekly vegetable box I am always thinking how to use this "stupid" vegetable !!! Cauliflower is not on my list over favourite vegetable at all. Most times I decided to make soup "get ride" of the "stupid" vegetable. However, I have always been left with the feeling, that this soup need some more texture/viscosity.Therefore I decided to merge the cauliflower soup with the THE Potato Soup, which turned to be a match made in heaven :-)

Soup with cauliflower and potatoes: - 3 servings
  • 250 g potato - in bigger squares
  • 1 onion (100 g) - in bigger squares
  • 1 cauliflower - in florets
  • 9 dl vegetable stock
  • 1-1½ dl full-fat cream (38% fat)
  • salt & pepper
  1. Put all the vegetable into a medium size cooking pot together with 4-5 dl vegetable stock.
  2. Boil the vegetables, until the potatoes is soft (15-20 minutes)
  3. Blend everything to a homogeneous mass without vegetable lumps
  4. Add in the remaining of the vegetable stock together with the cream. Cook up to the boiling point
  5. Season with salt and pepper
  6. Serve with bread
  7. Ready, eat and enjoy :-))

February 14, 2014

Valentine Cherry


CHEERS LOVE

We are coming to the end of a very romantic and tasteful Valentine Day. We will end this day of love with a spark of champagne in this red sweet yet refreshing cocktail.

I hope you have enjoy my five different recipes of how to celebrate Valentines Day with joy :-)

Valentine Cherry:
  • 1 tablespoon pomegranate syrup
  • 3 tablespoon cherry wine
  • champagne or sparkling wine - dry version in order to control the overall sweetness
  1. Fill  the pomegranate syrup and cherry wine into a champagne glass.
  2. Fill up the rest of the glass with champagne or sparkling wine.
  3. Cheers LOVE

White chocolate panna cotta with cherry sauce


A HEART FULL OF CHOCOLATE SERVED WITH CHERRY

Well, it is time a dessert on Valentine´s Day. So let´s enjoy a panna cotta with the shape of a heart :-)

Karen from Lavender and Lovage has obviously enough selected chocolate for this romantic Winter month. For me Winter should have the colour of white, which is not the case at all living in Denmark !!!, so I decided to use white chocolate in for my contribution for the romantic tea table. The other universal colour of romance/love is red, which in my case is being translated into cherry sauce !!!! allowing me to use some left over Christmas stuff in form of cherry sauce.

So voila I making white chocolate panna cotta with cherry sauce :-)

The Tea Time Table is a monthly blogging event managed Karen from Lavender and Lovage and Jane from The Hedge Combers.


I decided to use this recipe on Femina´s panna cotta med hvid chokolade as starting point making one important change replacing the entire amount dairy whipping cream with a ratio of 50% milk and 50% dairy whipping cream, as I find using only dairy whipping cream gives a too fatty dessert.

Using a mixture of milk and dairy whipping cream also makes it possible to use an electrical beater in connection with adding in the gelatine sheets, ensuring that the gelatine is distributed evenly in the dessert without making these awful gelatine strings, which I remember with horror from my grandmother´s citronfromage (lemon mousse). Using a electrical beater on a panna cotta mix of dairy whipping cream could very easily turn the panna cotta in a cream mousse.

As I am having less cream in my version of this panna cotta, the sweetness from the sugar is coming more through, so you could consider either reduce the sugar level with 5-10 g to 50-55 g sugar or use fruit being more fresh than a sweet cherry sauce, if you have less of a sweet tooth.

White chocolate panna cotta with cherry sauce: - 6 portions
  • 250 g dairy whipping cream, 38% fat
  • 250 g milk, 0-3.5% fat
  • 60 g sugar
  • ½ vanilla pod - corns and pod
  • 75 g white chocolate - chopped finely
  • 3 leaves of gelatine
  • cherry sauce - glass of M&S Morello Cherries in Kirsh from my last shopping expedition to England
  1. Place the gelatine sheets in a bowl with cold water.
  2. Remove the vanilla corns from the pod, shred the corns apart using a little part of the sugar.
  3. Pour the milk and cream into a small cooking pot, adding in the sugar, vanilla corn and pod on top.
  4. Heat up the cream base, and let it cook gentle for 10 minutes.
  5. Put the white chocolate in a small mixing bowl.
  6. Slowly pour over the cream base over the white chocolate, while stirring.
  7. When the white chocolate is melted, squeeze the gelatine sheets for water, and them into the panna cotta mass.
  8. Stir very well to avoid gelatine strings. I use an electrical beater for this purpose.
  9. Pour the panna cotta mass in the serving forms.
  10. Store cold in the refrigerator for minimum 3-4 hours.
  11. Served the white chocolate panna cotta with cherry sauce.

Marzipan cake with raspberry and lime


ROMANTIC marzipan cake

I think it is time  for you to have a cup of coffee or tea with a heart cake :-)

I have found this recipe on these marzipan cakes on Himmelske Kager - kransekage med hindbær og lime. I have made no changes at all to the recipe. However, next time I will make a reduction on the amount of icing sugar, as I find the sweetness level to cover over the taste of raspberry and lime. I imaging a reduction of 20-25 g icing sugar to a total amount of 75-80 g icing sugar would give a more flavour full and less sweet taste.

Marzipan cake with raspberry and lime: - 20-25 cakes
  • 250 g marzipan
  • 100 g icing sugar
  • 15 g egg white
  • 1 organic lime - zest
  • 2 tablespoon freeze dried raspberry
  • icing
  • sugar heart for decoration
  1. Heat up the (conventional) oven to 200'C.
  2. Knead the marzipan, icing sugar, egg white and lime zest together by hand to a homogeneous mass.
  3. At the end of the kneading process add in the freeze dried raspberry.
  4. Roll the marzipan cake mass into long strings, which is cut into a desired length.
  5. Place the marzipan cake on a baking tray covered with baking paper.
  6. Bake the marzipan cake in the upper part of the oven at 200'C for 10 minutes.
  7. Cool down the marzipan cakes.
  8. Make some icing for gluing on the heart shape decoration.

Valentine Day Cream Caramel


A HEART FOR A SWEET

It is now hours ago, that we started Valentine Day with Sweetheart Yogurt, so I think it is time for a little sweet to get us through to lunch time.

Some time ago my blog and I received a bottle of liquid glucose syrup together with various candy recipes. So fare I have been making caramels (toffee) twice using my microwave oven with little success, as the caramels have be floating together.
Using glucose syrup is either ice cream or toffee /caramels are prevent crystal growth and graininess according to the information, which I received together with the bottle of glucose syrup.

So I decided to try to make caramels using the classic procedure by boiling the caramel mass in a saucepan to a certain temperature using my new best kitchen companion, a digital thermometer !!! while I at the same time managed to tick of the very first point on my TO-DO-LIST 2014 - juuhuuu :-)

In the various recipes, which I received, I see that the boiling temperature can be between 125'C and 137'C. So fare I have no idea, which influence the boiling temperature is having on the final texture of the caramels. Well, I think I will test this some time and share the outcome with you.

And finally I got success with my caramel creation, as they firm/crunchy with an excellent creamy texture and buttery flavour notes.

I filled the caramel mass into these lovely small heart shaped alu-forms with small pink and red hearts on, which I found in my Christmas stocking during the last festive season. So a huge thank you to the colleague, which placed these heart forms in my stocking :-)


Valentine Day Cream Caramels: - 40-50 cream toffees

  • 100 g butter
  • 200 g dairy whipping cream, 35-40% fat
  • 340 g sugar
  • 160 g light sugar syrup
  • 2 tablespoons glucose syrup
  1. Add all the ingredients into a small cooking pot.
  2. Stir continues, as the caramel mass is heated up, until the temperature reach 137'C.
  3. Fill the caramel mass into small alu- or paper-form.
  4. Place the caramels cold, until they cooled down.
  5. Store in an airtight container.
  6. A sweet treat for a sweet person.

Sweetheart Yogurt


Good morning Sweetheart :-)

It is time for you to get up and enjoy this entire day of Romance.

And the day starts off with a bowl of Greek yogurt for breakfast, so you have something nutritional in your stomach for all the upcoming sweets of today.

Sweetheart Yogurt: - 1 serving
  • 200 g Greek yogurt
  • 10 walnuts
  • 10 almonds
  • 1½ tablespoon pomegranate syrup
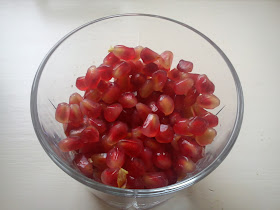
  • 2 tablespoons pomegranate kernels
  1. Start by roasting the walnuts and almonds on a hot frying pan for a few minutes. 
  2. After the roasting chopped the nuts roughly.
  3. Add the Greek yogurt into the serving dish
  4. Fill the pomegranate syrup on top of the yogurt followed by chopped and roasted walnuts and almonds.
  5. Finish off with some pomegranate kernels as topping - perhaps in the shape of a heart ?
  6. Grab a spoon and enjoy this start on a romantic day :-)

February 13, 2014

Are you my Valentine tomorrow ?


Tomorrow it is Valentine Day, so perhaps you would like to make something special for your very own Valentine ?

Anyway you can be very, very certain, that I have been creative again, so look around again tomorrow where I will be sharing some more Valentine ideas with you. posting from early morning to later in the evening :-)

I have the following suggestions, if you were my Valentine ?


Valentine cookies with pomegranate kernels, white chocolate and rose extract.


Valentine Romance Scones baked in heart shaped form and full of butter, white chocolate and the wonderful Amarena Fabbri cherries


LOVE cupcakes full of yet some more amazing Amarena Fabbri cheeries.


My Valentine cocktail is sparkling tasty combination of rose extract, Cointreau, cranberry juice and sparkling wine for you celebrate your love with.


And as final suggestion thisValentine sparkling cocktail being sparkling wine with rose extract.

February 12, 2014

Dinner at Scandic Grand Marina

Blinis as starter
It is can be very easy and tempting to eat at the hotel, when you are travelling and it is -15'C outside and snow everywhere. But sometimes you are better off putting on your polar outfit and get outside to find a restaurant in the neighbourhood.

Well, I did the first part during a recent business trip to Helsinki = eating at the hotel !!!

As starter I was served blinis with salmon and sour cream. I could not complain about the size of the starter, however I would have preferred the blinis to be thinner instead of being the size of Camembert size !!!

As main course I had selected pasta with mushrooms, which was another big size portion being to fatty for my preference. 

The best part of the meal turned to be the dessert, where I had selected pear pie with marzipan having a more appealing look being served together with fresh fruit.

I ended to with paying approx 45 € for the food, 1 glass of white wine and 1 cup tea. I will give this meal 2 stars, as I think the overall quality in form of taste and texture has plenty of room for improvement. No complaints on the serving sizes, which easily could feed two persons.


February 11, 2014

Pomegranate syrup


It is high season for pomegranates, which is so fully of taste, bursting texture, vitamin C and some active ingredients being of great benefit for your facial look, as they perhaps will remove your wrinkles !!!

I am making pomegranate syrup, as I will be needing this specific syrup for Valentine´s Day this upcoming Friday for two recipes, the first one in the very morning and the second in the evening. Well, you have to look into my kitchen on Valentine´s Day to see, what is going on :-)

Pomegranate syrup:
  • 1 pomegranates
  • 50 g sugar
  • ½ tablespoon lemon juice
  • 1 tablespoon water
  1. Divide the pomegranate into 4 pieces. Remove the kernels. Do this over a cooking pot, so you do not waste the wonderful juice of pomegranate.
  2. Add lemon juice, water and sugar to the pomegranate kernels in the cooking pot.
  3. Let it boil for approx 10 minutes, while stirring regular.
  4. Pass the pomegranate syrup through a sieve and collect the syrup.
  5. Cool down the syrup.
  6. Store the syrup in the refrigerator.

February 09, 2014

Risotto with squash


I will not mentioned any names, but some people have been asking me, if I am going "ottomok" !!!! Perhaps because I have been sharing four recipes on risottos and speltotto with you over the last 3½ weeks. Well here is another recipe on risotto, which arrived together with my weekly vegetable box this week (newsletter 6/2014). And as it gave me the chance to use the squash in risotto, I knew at once I had to make yet another risotto. I have made a few adjustments on the amount of rice and vegetable stock.

Many greeting to certain people in Horsens from the "ottomok" :-)

Risotto with squash: - 2-3 servings
  • 1 onion - chopped
  • 2 clove of garlic - finely chopped
  • 1 squash - chopped
  • 2 tablespoons olive oil 
  • 250 g risotto rice
  • 2 dl white wine
  • 8 dl vegetable stock - warm
  • 20-25 g butter - i smaller pieces
  • 50 g Parmesan cheese - grated
  • salt and pepper for seasoning
  1. Chopped all the vegetable in the desired size.
  2. Heat up the olive oil in a bigger cooking pot. Add all the vegetable and fry them for 2-3 minutes.
  3. Add the risotto rice and stir them around for 1 minute to absorb the oil.
  4. Pour in the white wine on top of the vegetable and rice and let the wine cook at lower heat, until the majority of the wine has boiled away. 
  5. Afterwards add the warm vegetable stock little by little, let the rice absorb most of the liquid, before adding more vegetable stock. This part of the cooking process takes approx. 20 minutes.Keep stirring regular.
  6. Season with salt and pepper.
  7. Add the smaller butter pieces and let them melt into the risotto together with the grated Parmesan cheese.
  8. Serve the risotto with grated Parmesan in the serving plates/bowls. 
  9. Eat together with the white wine. 

February 08, 2014

Knitted plaid after 4 weeks of knitting


It is 3 weeks ago, that I shared my first progress after 1 week of knitting, how it is was going on my knitting of a plaid in wool with you. After 4 weeks of knitting I have managed to six colour rows out of the entire 17 colour rows, so I definitely progressing having finished more than 1/3 !!!

Hannibal the Cat is not interested at all in the yarn balls now, he is either sound asleep on the top of my drink cabinet or outside the house enjoying himself

Besides from knitting today I have been quiet busy all morning in my kitchen making various exciting recipes for the upcoming Valentine´s Day, as I am planning to surprise you with five very different recipes this coming Friday from early morning to late evening. So look by my kitchen on Valentine´s Day for some inspiration for your very own Valentine :-)

February 07, 2014

Blood orange curd


I adore blood orange for it´s vibrant colour and it´s orange taste with that extra flavour twist. And when I am in Germany shopping I always buy juice of 100% blood orange to take home with me, as we here in Denmark "only" can get a mixture of orange juice and blood orange juice.

So when I saw a blog posting on blood orange curd by Cookies, cakes and bakes on the Tea Time Treats January 2014, I knew at once, that I NEEDED to make some blood orange curd using this recipe on lemon curd as starting point with some adjustments.

As blood oranges continue to be in season I playing with the idea of making some blood orange jam. If you have an excellent recipe on blood orange jam, please feel free to share it with me ?

Blood orange curd:
  • 5 eggs
  • 300 g sugar
  • 3 organic blood orange - zest and juice
  • 50 g butter - cut into smaller pieces
  • 1/4 lemon - juice - optional
  • red food colour - optional
  1. Start by adding boiling water to the storage containers/glasses.
  2. Take the zest from the blood oranges as well as squeeze the blood oranges for their juice.
  3. Whip eggs and sugar together in a bowl, before pouring this mass into a small cooking pot.
  4. Afterwards add in the blood orange zest and juice.
  5. Heat on the blood orange curd mass on low heat, stir very well in the mass, heat the mass until it thickens. The blood orange curd must not boil.
  6. If you want a more redish colour add in some red food colour.
  7. Add into lemon juice, if you would like a twist in form of freshness and more fruitness. Add in the lemon juice little by little, stir very weel after each addition and taste and make up your mind, if more lemon juice would be a benefit for the overall taste.
  8. Remove the cooking pot form the heat and stir in the butter and let it melt.
  9. Pour the blood orange curd into the prepared containers/glass and place them in the refrigerator.
  10. In case you add no preservation to the blood orange curd, the shelf-life of it is approx. 1 week, when stored cold in the refrigerator.

February 05, 2014

Runeberg´s torte - Runebergintorttu


Travelling on regular basis in Finland in the cold Winter months of January and February I have noticing as well as tasting a very Finnish cake called Runeberg's torte described on Wikipedia. It is a cake in sort of a muffin shape decorated with raspberry jam and white icing sugar on the top. The flavour inside the cake is dominated by cardamon and some sort of alcohol, very tasteful combination. This cake is named after Johan Ludvig Runeberg, which was eating this cake for breakfast !!!

Commercial Finnish Runebergintorttu
Today (5 February) it is the birthday of Runeberg, so I have decided I should try to bake my version of this cake, which I have been enjoying for more than 10 years travelling in Finland. So I have spend some time locating a recipe on this Runeberg´s torte on Goggle, using Goggle Translate for the translation part from Finnish into Danish. I decided to try out this recipe on Runebergin tortut by Kinuskikissa.

In order to have less top on the muffin I reduced the amount of baking powder to 50% as well as place the muffins in the lower part of the oven during baking. The muffin top was reduced, nut I still had to cut off the top of the muffin, so the upside of the muffin became the downside of the Runeberg´s torte.

It is quiet a messy cake to make due to the high fat content and the dipping process of cake in a sugar-alcohol syrup after the baking process.

So I have already decided to make my own Danish version in 2015 !!! Hopefully being respectful enough of the Finns and their cake.

Runeberg´s Torte a la Kinuskikissa: - 14 cakes

  • 100 g honey cakes - blended together
  • 150 g almonds - grounded into flour
  • 180 g (cake) flour
  • 1 teaspoon baking powder
  • 1 tablespoon cardamon
  • 1 tablespoon vanilla sugar
  • 250 g butter - room temperature
  • 4 eggs - room temperature
  • 310 g sugar
  • 200 g dairy whipping cream, 35-40% fat
  • 200 g water
  • 4 tablespoon sugar
  • 4 tablespoon cardamon liqueur
  • raspberry jam
  • icing sugar
  1. Heat up the oven to 200'C.
  2. Mix blended honey cake together with flour, almond flour, baking powder, cardamon and vanilla sugar.
  3. Whip the butter and sugar together in a fluffy white mass using an electrical mixer. I normally whip for 5 minutes.
  4. Whip in the egg, one by one, without whipping to much.
  5. Shift from electrical mixer to mixing gentle by hand in order not to over whip the cake mix. 
  6. Alternating stir in whipping cream and flour mix into the cake mix.
  7. Fill the cake mix into muffin forms.
  8. Bake the muffins in the middle/lower part of the oven at 200'C for 30-35 minutes.
  9. Before removing the muffin check, that the muffin is baked using a cake tester.
  10. Cool down the muffins.
  11. Cut off the muffin top using a knife, the upside of the muffin is now the downside of the Runeberg´s torte.
  12. Heat up the water and sugar in a small cooking pot, until the sugar is dissolved.
  13. Cool down this sugar syrup and add the cardamon liqueur in.
  14. Dip the muffin into this sugar-alcohol syrup, so all of the muffin is soaked.
  15. Remove the muffin from the sugar-alcohol syrup.
  16. Decorate the Runeberg´s torte with raspberry jam with a ring of icing sugar around the jam.

February 02, 2014

Speltotto with Edam beans


As you know, I am huge fan of risotto, so when I saw this recipe on speltotto with Edam beans in the weekly magazine "Alt for Damerne", issue unknown from 2013, I knew at once, that I wanted to test it out in my little kitchen working with something than the usual rice grains.

However, I decided to the following changes:
  • use a combination of white wine and vegetable stock instead of just vegetable stock
  • addition of butter on top, as I like the cream sensation and the flavour coming the butter
  • addition of sugar peas, as I had a rest of this in my refrigerator, which needed to be used for something than cabbage.

If you make a bigger portion it is important, that you first added the water cress on the part of speltotto, which you will be eating that particular day, as fresh water cress can contain earth bacteria, which is unwanted in food, which will be cooled down and reheated later on.

Speltotto with Edam beans: - 4 servings
  • 3 scalots - finely chopped
  • 1 clove of garlic - finely chopped
  • 4 stems celery - finely chopped
  • 2 tablespoons olive oil 
  • 340 g spelt grains
  • 2½ dl white wine
  • 7½ dl vegetable stock - warm
  • 50 g butter - i smaller pieces
  • 80 g Parmesan cheese - grated
  • 170 g Edam beans
  • 100 g sugar peas - optional
  • water cress - chopped
  • salt and pepper for seasoning
  1. Chopped all the vegetable in the desired size.
  2. Heat up the olive oil in a bigger cooking pot. Add all the vegetable and fry them for 2-3 minutes.
  3. Add the spelt grains and stir them around for 1 minute to absorb the oil.
  4. Pour in the white wine on top of the vegetable and spelt grains and let the wine cook at lower heat, until the majority of the wine has boiled away. 
  5. Afterwards add the warm vegetable stock little by little, let the spelt grains absorb most of the liquid, before adding more vegetable stock. This part of the cooking process takes approx. 20-25 minutes. Keep stirring regular.
  6. Season with salt and pepper.
  7. Add the smaller butter pieces and let them melt into the speltotto.
  8. Add the Edam beans and sugar peas and stir well into the speltotto
  9. Add approx 40 g of the grated Parmesan cheese and stir well. 
  10. Top of the speltotto top with the rest of the grated Parmesan and chopped parsley on the serving plates/bowls. 
  11. Enjoy together with a glass of white wine.

February 01, 2014

Welcome to February - the romantic Winter month


 Welcome to February 

Why do I call February the romantic Winter month ?

Well in the middle of February Valentine´s Day is located !!! Valentine´s Day is not a big event here in Denmark, besides from the flower shops trying to make an event of the day in the hope, that they will sell more flowers.

For me Valentine´s Day is providing me with a theme, which can work as inspiration for various sweet thing to test out in my little kitchen. And I will already now promise you, that I have several ideas floating around in my head, so you have something to look forward with regards to blog posting midway through the last Winter month.


Well my focus for January was to share recipes on stews and casseroles with you !! Did I succeed with this ? Well if you can call risottos for casseroles, I have been doing pretty good sharing 6 various comforting meals with you, and they have help me to keep warm during a Winter becoming more and more cold due to strong wind and low temperatures.


Let´s end with a little romance: