Pages

December 31, 2018

Christmas coffee 2018 for local friends


In connection with Christmas I usual invite some local friends around my house (and kitchen) for an annual Christmas coffee, so my guests can help me to eat some of the many home-made Christmas calories. It is also great to fill up my kitchen living area with plenty of great friends, talk and laughter during these very short and dark Winter days.

This year I had in advance asked my coffee/tea guests, if they would drink tea or coffee (not an option to drink both coffee and tea !!!). I have enough china tea cups tea cups, but I needed to borrow china coffee cups from my mother, so all my guests could be served on various blue china pattern. I also needed to borrow a coffee machine from my mother, as I do not have such equipment being a true tea drinker.

This time I placed the cream cake decorated with whipped cream inside the refrigerator, so Hannibal the Cat did NOT lick the cream, while I was busy with last thing in the kitchen as well as lightning some tea light lamps out at the entrance as welcome to my guests.

The liquid part of the "menu" this time not the usual warm glögg, but instead of Winter cider with a low alcohol content, as the majority of guests were driving. I think, I will serve spiced apple juice another time, as the taste of the cider was too plain for my taste.

As the eatable part of this Christmas coffee was:


One of my my guests had seen my post on Christman bun in kløben style and thought, that I was serving these buns for the Christmas coffee, however these buns were long eaten, so therefore I made a Chritmas version of these our cream buns


The "sweet part" of the Christmas coffee menu was:
And here my Christmas style serving item really could be used as well as admired in all it´s gloria by my guests, who wanted to know, how to get such a item created.


Besides from helping me with eating plenty of Christmas calories, I also got some more items for my Royal Copenhagen China, so my guests could ensure, that there is room for more guests to be invited in the future.

And yes, ladies of Vejle you will be invited again for another round of Christmas coffee in 2019 :-)

Marzipan cake with rose for 2019


At Midnight New Year´s Eve it is tradition to enjoy marzipan cakes (kransekage) together with champagne/sparkling wine, when the bell will ring it´s 12 strokes.

This year I have been using this recipe on marzipan cake with ginger and lime as starting point for the basic marzipan cake and when as flavouring I have added in rose water extract. As a child my favourite Danish pastry was called "rosenbrød" (rose bread), if it tasted of rose I do not recall, so the taste of the name rose bread was very fascinating for me. Therefore, this year I have been adding in rose water extract in my home-made marzipan cake.

The dosage of the rose water extract is a starting point in form of 2 teaspoons, as I do not want the marzipan cakes to taste like eating soap. Let´s hope, my good friends in Horsens survive the rose water !

The advantage of baking your own marzipan cakes is, that you decided on both the sweetness level as well as the taste of these cakes, if you want to twist the taste.
Another advantage by baking your marzipan cake is, that you can use leftovers of marzipan after all the Christmas activities of home-made marzipan based Christmas sweets.

Marzipan cake with rose: - 28 pieces
  • 430 g marzipan
  • 105 g icing sugar
  • 105 g almond flour
  • 35 g egg white or 1 portion of 1½ pasteurised egg-white
  • 2 teaspoons rose water extract
  • Decoration: egg white + icing sugar + rose water extract - optional
  1. Heat the oven to 220'C (conventional oven).
  2. Add all the ingredients into a mixing bowl. 
  3. Knead all the ingredients together into a homogeneous mass.
  4. Divide the marzipan cake mass into 28 pieces of equal size.
  5. Form the marzipan cake mass into a long round sharp.
  6. Bake the marzipan cake mass at 220'C for 7-8 minutes. After 4 minutes baking time turn the plate around to get a more even baking of each marzipan cake.
  7. Cool down the marzipan cake.
  8. Decorate the top of the marzipan cake with icing sugar - optional.
  9. Let the icing sugar dry.
  10. Happy New Year :-)

December 30, 2018

New Year 2018 - suggestions for marzipan cakes


Christmas was packed down yesterday afternoon after the annual Christmas lunch for the Wonderful Women, so now it is time to prepare for New Year's Eve tomorrow. Here in Denmark the tradition is to eat marzipan cake (kransekage) together with a glass of champagne (it is best to drink sweet champagne, when you eat marzipan cake to avoid a clash in your mouth between sweet cake and dry champagne), as we step from the old year into the new year.

If you would like to bake your very own marzipan cakes, I will already now share my entire collection of various suggestions on marzipan cake (known as kransekage in Denmark), which I have created during the "life time" of Kitchen of Kiki. It will give you time to go shopping for the needed ingredients as well as baking them for New Year's Eve tomorrow and perhaps clear out the last Christmas marzipan left-overs.

I find, that the major advantages of making your own marzipan cake is, that you are in control of the overall  sweetness in the final cake, so you can make the cake more or less sweet according to your sweetness preference, instead for "just living with" the sweetness in the cakes, which you buy, which I find to be too sweet !!!

If you would like to have  more softness in your marzipan cake, you should freeze them after baking. The only drawback is, that I find freezing to reduce the overall flavour profile of the cake.


The "classic" type of marzipan cake is the white version of these zebra marzipan cake. The white version is made from plain marzipan, while the dark version is made from marzipan containing cocoa.


Another good tasting marzipan cake could be these marzipan orange cakes or with an extra little twist in of orange flower as here marzipan orange cakes with orange flower. A third suggestion giving similar looking cakes are marzipan cakes with clementine and Cointreau.


Another excellent taste twist on "kransekage" is pomegranate marzipan cake combining the freshness of pomegranate with the sweetness of marzipan.


As a colourful farewell to 2016 these baked marzipan confect are an option. The only drawback is, that the forest fruit marzipan (purple looking marzipan) is loosing colour during the baking !!! However, you do not need to worry about this topic, as Odense Marcipan has withdrawn this specific marzipan product from their product range.


In 2013 liquorice marzipan was the "new black flavour" within the marzipan world, as it so many other food items here in Danmark, so therefore I created these liquorice marzipan cake. Also in 2014 I made liquorice marzipan cake.


I 2016 I made these marzipan cake with ginger and lime.


Another fantastic flavour combination would be this marzipan cake with raspberry and lime, which you share with your sweet heart.


In 2015 I made this fantastic marzipan horn.

I will not be making any of the above mentioned suggestion for New Year's Eve, as I will trying out a new version of marzipan cake to mark the transition into 2019, so look by tomorrow on New Year Eve day for the marzipan creation of 2018 :-)
December 29, 2018

Christmas lunch for the Wonderful Women 2018


The annual Christmas lunch for "The Wonderful Women" took place yesterday afternoon for an almost complete group of great girl friends this year :-)

As usual we had the usual tapas selection from Osteriet together with some home-made cooking pot bread with a twist of brown sugar & maple syrup.

As usual we started off with alcohol-free drinks to say "merry Christmas", as most of the guests had to drive back home in their cars. This drink in form of  raspberry-lemon lemonade needs some serious flavour adjustments, as it was mostly like a sweet lemon soft drink !!! So plenty of room for improvement in the coming year of 2019.


The tradition also describes, that we have to play the gift play (pakkeleg in Danish) using a specific card game, so no dices as normal. All participants bring between 2-8 gifts, and in the card game you either end up with most of the gifts or not gifts at all.

Actually we are very trendy with our sustainable approach to playing "pakkeleg" as our presents have NOT been brought for this specific event, but they can be everything from your cupboard such as DVDs, paperbacks, ugly Christmas decorations, beers close to end of shelf-life and candy :-)

We have also learned, that we have to give approx 3 gifts to each participants as starting point to avoid, that either one ends up with all the gifts, or that the table ends with all the gift.

We still need to get the text on one of the play card rewritten, as it has a text, saying you should give a gift to each person under the age of 25 years, so here we are awaiting the new card text to be made, lets hope it will be ready for next years Christmas lunch.  

As usual we spend some great hours in good company getting up to date with each others lifes :-)

December 27, 2018

Aqua vitas for Christmas lunch


Tomorrow the annual Christmas lunch for the wonderful women will take place, and in this connection I have prepared the following aqua vitas with Christmas as theme:

The menu will be the "usual theme" in form of cheese tapas from Osteriet, as I think we all more or less have been eating the herrings and pig stuff, which we need for the remaining part of 2018 at the many previous Christmas lunches.

All the participants will bring a selection of various presents, which we use for another very Danish Christmas tradition in form of "pakkeleg". The presents will be, that we can find as "leftovers" spare parts in our various cupboards. So no demands with regards to value of the actual gift, but the more gifts the better. I have been "winning" stuff such as empty Christmas beer bottle, ingredients for red cabbage salad, books, DVDs etc, so you never know, what will be inside the presents :-)

December 24, 2018

Christmas Calendar 2018 - Merry Christmas to all of you with a glass for Winter cider


I want to wish all of you a merry Christmas and thank you for dropping by on small visits to my little kitchen :-) I hope you have enjoyed your visit(s), few or many, here, being either a short browse or a long stay.

Today is the day of farewell to this year Christmas Calendar of 2018, which I hope have brought you joy during a perhaps stressful Christmas time. I have for sure got a kitchen full of Christmas goodies, when making all the many blog posts for this year´s Christmas Calendar.

Thank your for dropping by and have wonderful Christmas together with your family :-)

In case you want to serve to some type of mulled wine I hereby share the very last recipe from this year's Christmas Calendar with you. It is a recipe from the weekly magazine of Søndag (December 2018). I decided to add in less of the vanilla pod, as the prices on vanilla pods are gigantic nowadays.

Winter cider: - 10-12 servings

  • 3 bottles of 75 cl apple cider (NOT the flavoured soft drink style of cider, but the real stuff)
  • 9 cloves
  • 3 star anise
  • 3 cinnamon sticks
  • 4½ tablespoon brown sugar
  • muscat nut - grated - addition according to your taste preference
  • ½ vanilla pod - both vanilla corns as well as pod
  1. Pour the apple cider into a medium-large cooking pot.
  2. Add in all the spices and sugar.
  3. Open up the ½ vanilla pod, remove the vanilla corns. Add both the vanilla corns as well as the vanilla pod into the cider mixture.
  4. Bring the cider and spices up in temperature, the cider should not be boiling.
  5. Pour the cider into glass and serve the cider warm.
  6. Cheers and merry Christmas :-)

December 23, 2018

Christmas Calendar 2018 - Rice pudding in luxury version


Tomorrow it is Christmas Eve and here you can already prepare the classic Danish Christmas dessert  ris a la mande today. I have for this year Christmas decided to turn this recipe into a more luxury version, as I am using more whipping cream and almond splits.

The rice porridge part of this traditional danish Christmas dessert can be a little challenging to make, as you very easy can burn the rice porridge. However, if you have Tupperware Easy Rice cooker, when you will no longer have this issue of burnt rice porridge.

Luxury rice pudding: - 2-3 portion
  • 1½ dl porride rice
  • 4½ dl water
  • 1½ dl full-fat milk
  • ½ vanilla pod
  • 2 tabelspoon sugar
  • almond split from 25 almonds without skin
  • 2½ dl dairy whipping cream - 38% fat
  • cherry sauce or cherries in rum
  1. Cook the rice and water in the EasyRice cooker in the microwave oven - 15 minutes - 800 W.  Do NOT cook the rice porridge with the milk in the EasyRice cooker as you will damage your Tupperware plastic thing.
  2. Take the EasyRice cooker out of the microwave oven.
  3. Add the milk together with vanilla corns as well as the vanilla pod in the Mircroplus pot. Heat it up to the boiling point.
  4. Mix the warm milk with the rice in the EasyRice cooker and leave it for 10 minute. Also add sugar.
  5. After 10 minutes cold down the rice porridge.
  6. When the rice porridge is cooled down, remove the vanilla pod. If you can the whipped dairy cream in warm rice porridge, when the whipped cream will melt !!!
  7. Whipped the dairy whipping cream.
  8. Mix cold rice porridge, almond splits and cream together, gentle mixing.
  9. Heat up the cherry sauce.
  10. Serve and enjoy :-) Happy Christmas :-)

December 22, 2018

Christmas Calendar 2018 - Cream cake with cherry sauce


Recently I had various guests coming around for some coffee/tea in the run up for Christmas. Beside from serving  Christmas buns I also decided to make a cream cake using cherry sauce. Cherry sauce is a very important ingredient for the Christmas dessert Ris a la mande, so perhaps if you have some leftovers of cherry sauce you can use for making a cream cake.

Cream cake with cherry sauce: - 10-12  pieces
  • 3 cake plates
  • 500 g cherry sauce
  • 4 sheets of gelatine
  • ½ l vanilla cream
  • 250 ml dairy whipping cream
  • amarena cherry sauce for the icing layer
  • icing sugar
  • amarena cherries for decoration - optional
  1. Place one of the cake plate as bottom layer in spring form. 
  2. Place the gelatine sheets in a bowl with cold water, let the sheets soak for 5-10 minutes.
  3. Add the cherry sauce in a cooking pot. Heat up the sauce to 35-40'C. 
  4. Squeeze the gelatine sheets for excess water. Add the gelatine sheets into the cherry sauce. Stir the sauce, until the gelatine sheets are melted into the sauce.
  5. Fill the cherry sauce on top of the cake plate.
  6. Store the cherry sauce covered cake plate in the refrigerator for 3-4 hours or night over.
  7. Make the vanilla cream.
  8. Remove the cherry sauce coated cake plate from the spring form. Place it on the serving plate.
  9. Add ½ of the vanilla cream on top of the cherry sauce layer.
  10. Place a cake plate on top of the vanilla cream.
  11. Fill the remaining vanilla cream on top of the cake plate. Place the final cake plate on top of the vanilla cream.
  12. Make an incing layer from amarena cherry sauce liquid and incing sugar.
  13. Cover the top cake in this cherry icing. Decorate with amarena cherries.
  14. Decorate the sides of the cream cake with whipped dairy cream.
  15. Place the cream cake cold until serving.
  16. Enjoy the cake with a good cup of coffee or tea.

December 21, 2018

Christmas Calendar 2018 - Apple & Elderflower Fizz


Let´s celebrate, that the Christmas vacation is nearly there and I so ready to go on vacation until the 2 January 2019. And what better to celebrate, when by serving a glass of bobbles.

I have found the recipe on apple & elderflower fizz in the December issue of Country Living. The only change I have made is to replace the elderflower liqueur with plain elderflower cordial, so it is more easy for people to count the amount of alcohol in these busy time of gathering, where alcohol is served.

If you have a lot of guests coming around, you can prepare the glasses by adding in the elderflower cordial and apple juice, before the guests actually arrive, so you only have to fill the glass with sparkling wine, as you the glass to the arriving guests.

Apple & Elderflower fizz: - 8 glasses

  • 200 ml elderflower cordial
  • 200 ml apple juice
  • 1 bottle of sparkling wine
  1. Fill the elderflower and apple juice into champagne glasses
  2. Top up with sparkling wine.
  3. Garnish with slice of apple and sprig of mint - optional.
  4. Cheer and enjoy the Christmas vacation :-)

December 20, 2018

Christmas Calendar 2018 - Aqua vita with Christmas spices


Well, if you have not managed to find the time yet for making your very own Christmas aquavita, when you still have time to make this version. This recipe is as well from the Christmas magazine being a part of the weekly magazine Søndag. This aqua vita only requires a storage time of 2-3 days, so this is still feasible to make for some the Christmas lunches taking place during the Christmas Days.

The only adjustment, which I made, was to replace the bitter orange peel with sucat, as I did not have any bitter orange peel available in my kitchen cupboards.

To make this portion of Christmas aqua vita I used the remaining ½ bottle of vodka after my experiment with apple aqua vita.

Aqua vita with Christmas spices: - ½ portion
  • ½ bottle of vodka (35 cl)
  • ½ teaspoon of honey
  • 2 teaspoons of sucat
  • 4 cardamon seeds
  • 1/4 cm fresh ginger - without peel and divided into smaller pieces
  1. Prepare the storage glass by adding boiling water to it.
  2. Empty the storage glass for the water.
  3. Add honey, sucat and the spices into the storage glass.
  4. Pour the vodka on top and close the glass.
  5. Place the storage dark for 2-3 days.
  6. Pass the vodka through a sieve in order to remove the sucat and spices.
  7. Pour the Christmas aqua vita into a glass bottle.
  8. Enjoy and merry Christman :-)

December 19, 2018

Christmas Calendar 2018 - Sour cream buns with Christmas twist


For this Christmas coffee, which I am serving this evening for local friends, I have baked a Christmas version of these classic bun with sour cream & milk. One of my coming evening guests thought I would be serving buns, when she noticed this post on Christman buns kløben style on my blog, but these buns baked with yeast are best eaten within 1-2 days after their baking.

Christmas buns kløben style: - 16-20 buns
  • 650 g wheat flour
  • 50 g sugar
  • 2½ dl full-fat sour cream with 38% fat 
  • 50 g fresh yeast
  • 1 egg
  • 8 g salt
  • 200 g water
  • 1 organic orange - only the zest
  • 75 g cranberries
  • egg wash
  1. Weigh all the ingredients directly into the mixing bowl of the stand alone mixer. Keep salt & sugar away from the yeast.
  2. Place the bowl on the stand-alone mixer.
  3. Start knead the dough at speed 1 for 8 minutes.
  4. Afterwards increase the speed to 4, knead for 2 minutes. Check the consistency of the dough. If it is not OK, when knead it at speed 4 for another 2 minutes. Again check the consistency. If needed, knead again for 1 minute and when check consistency of the dough.
  5. Remove the dough from the mixing bowl and place it on the kitchen table sprinkled with flour.
  6. Let the entire dough raise for approx 20 minutes under a damp cloth.
  7. When you evaluate, that the dough has raise enough, divide the dough into smaller pieces with a weight of 60-70 g each.
  8. Shape the dough pieces into bun shapes. Place the bun pieces on the baking tray covered with baking parchment. 
  9. Let the bun raise for second time for approx 40 minutes under a tea towel.
  10. Heat up the oven to 200'C.
  11. Bake the bun at 200'C for 10-15 minutes.
  12. Cold down the buns, before serving them with butter and apple jelly.

December 18, 2018

Christmas Calendar 2018 - Walnut cream cake with Christmas twist


One of my favorite cream cakes is the walnut cream cake a la Svinkløv Badehotel, so I decided to make it more Christmas style for the recent Royal Christmas Afternoon Tea. The Christmas twist from my side was to use a mixture of walnuts and pecan nuts, replacing the dark chocolate with dark milk chocolate (due to personal preference), using chocolate cakes buns instead of plain cake buns and finally glazing the top cake bun with nougat instead of the coffee icing sugar layer.

Also the size was changed from the usual one big size to smaller portion servings. I used a glass to cut out from the big cake bun into the smaller size.

Walnut cream cake with Christmas twist: - 4  pieces
  • 3 chocolate cake plates
  • vanilla rum for brushing of the cake plates - optional
  • 250 ml dairy whipping cream
  • 1 tablespoon home-made vanilla sugar
  • 35  g walnuts - chopped
  • 35 g pecan nuts - chopped
  • 45 g dark milk chocolate - chopped
  • 30 g nougat
  • walnut - whole for decoration of the top layer
  1. Start by cutting out the cake buns using a glass, I got 4 smaller pieces out of each cake bun. 
  2. Brush the cake bun with rum.
  3. Whip the dairy whipping cream with vanilla sugar into firm whipped cream.
  4. Gently stir in the chopped walnuts, pecan nuts and chocolate into the whipped cream.
  5. Place a cake plate on the serving plate. Place half of the cream cake filling on the cake plate.
  6. Place the second cake plate on top of the cream cake filling. Place the second half of the cream cake filling on the second cake plate. 
  7. Place the third cake plate on the cream cake filling.
  8. Heat up the nougat in the microwave oven, so it becomes fluid and can be brush on top of the last top cake bun.
  9. Decorate the nougat glaze with one walnut per cake serving..
  10. Place the cream cake cold in the refrigerator for minimum 1 hour, for the cake to set up.
  11. Enjoy the cake with a good cup of coffee or tea.

December 17, 2018

Christmas Calendar 2018 - Scones with marzipan and orange


For the recent Royal Christmas Afternoon Tea I as usual made scones twisting the recipe on plain yogurt scones to be more Christmas like by adding in marzipan and orange zest. As I have been adding in marzipan, I decided to reduce the sugar level from 85 g to 50 g, as the marzipan also brings sweetness.

The scones were served together with butter and apple jelly.

As type of yogurt you can what ever type of plain un-sweet yogurt, which you have in your refrigerator. I have used this recipe with both Greek-style yogurt, plain semi-skimmed yogurt or even thich mik. so there is no need to buy a special type of yogurt for the creation of  these scones.

Scones with marzipan and orange: 9-10 scones
  • 350 g wheat flour
  • 1 teaspoon baking powder
  • 50 g sugar 
  • 85 g butter - diced into small pieces
  • 1 organic orange - only the zest
  • 75 g marzipan - grated
  • 175 g plain Greek-style yogurt - yogurt without addition of neither sugar or fruit
  • egg wash
  1. Cover a baking tray with baking parchment. 
  2. Mix the flour, baking powder, orange zest and sugar together in a mixing bowl.
  3. Add in the butter pieces, rub in the butter using only your fingers, until the mixture looks like fine breadcrumbs.
  4. Afterward add in the grated marzipan.
  5. Make a hole in the mixture, where the yogurt is pour into. Knead the scone dough together, until it is soft.
  6. Roll out the scone dough in a thickness of 2 cm.
  7. Cut out the scones from the dough using a cutter. Do not twist the cutter, while doing this.
  8. Turn the scone up side down, when it is placed on the baking tray.
  9. Let the scones raise for 15-30 minutes prior to baking or even more.
  10. Before making, brush the the top of the scones with egg wash (only the top, as this affect the raising of the scone during baking). 
  11. Bake the scones at 200'C for 15-20 minutes, until golden.
  12. Cold down prior to serving.
  13. Serve together with tea and apple jelly.

December 16, 2018

Royal Christmas Afternoon Tea


In the run period for Christmas I usual invite various people around, so they help me to "get through" the many different type of calories involved in creating a Christmas Calendar :-)

This afternoon it was my good friends from Horsens, who came by for Royal version of a Christmas afternoon tea. As preparation for the calorie eating part of the afternoon tea we started off with a walk around the neighborhood.

It also gave me the opportunity to use the various item of china from Royal Copenhagen such as china tea cupsBlå Blomst tea cup & White Element serving dish. And my Christmas serving item was used for the various sweet treats.

We started off with a glass of Apple & Elderflower Fizz as the non-tea drinking stuff :-)


The first eatable stuff was these  scones with marzipan & orange served together with butter and  apple jelly. The second part was the Lucia buns.


The cake part of the afternoon tea was walnut cream cake with Christmas twist and make into single serving portion.

And to finish off we could enjoy the following sweet treats:

Christmas Calendar 2018 - Nougat confect with pecan nuts


If you are on look out for some very easy sweet treat to make for Christmas, when these pieces of nougat are extremely easy to make. The preparation time is limited to a max 5 minutes, and you do not even get dirty hands !!! followed by a setting time of around 2-3 hours.

I have previous been making these nougat confect. However, this Christmas I decided to twist the recipe by adding in some pecan nuts and by decorating with a hazel nut on the top.

Nougat confect withh pecan nuts: - 19 pieces
  • 100 g soft nougat
  • 50 g dark chocolate
  • 50 g pecan nuts - fine-medium chopped
  • 19 hazel nuts for decoration - optional
  • tempered dark chocolate for the addition of the hazel nuts
  1. Melt the nougat and dark chocolate in the microwave oven little by little, so the chocolate is not burned.
  2. Stir in the chopped pecan nuts into the nougat mass.
  3. Fill the mass into a candy silicone form.
  4. Store the form in the refrigerator for 2-3 hours, until the nougat is firm again.
  5. Remove the nougat from the silicone form.
  6. Temper the dark chocolate. Use the chocolate as "glue" to add the hazel nuts as decoration on top of the nougat confect.
  7. Store the nougat in refrigerator in an air-tight container.

December 15, 2018

Christmas Calendar 2018 - Marzipan rolls with speculoos filling


I think it is time to start making various sweet treat for the fast approaching Christmas, which you can serve for some of the Christmas guests coming by in the next 1-2 weeks.

The Christmas sweet treat in form of marzipan rolled with a filling some kind is a very classic Danish Christmas treat.

You can have a look here as will for other suggestions for the filling part:

The marzipan roll with walnuts as decoration is the classis marzipan roll with nougat filling. The other roll is marzipan with a filling of speculoos pasta (brought on tour to Alsace in June) decorate with pecan nuts.

You can either make one roll or 3 smaller rolls. The advantages of the smaller rolls is, that you can always serve a "fresh" roll during the Christmas period.

Marzipan roll with speculoos filling: - 1 big roll or 3 smaller rolls
  • 200 g marzipan
  • 100 g speculoos paste
  • 100 g dark chocolate
  • pecan nuts - optional
  1. Start by rolling the marzipan thin. I sprinkle with icing sugar below and on top of the marzipan and move it around after some rolling movements, so it does not stick to the surface.
  2. Stir the speculoos pasta, so it is more easy to spread on top of the marzipan. 
  3. Add the speculoos pasta on top of the marzipan in a thin layer. 
  4. Role the marzipan into a role.
  5. Temper the dark chocolate. First covering the upper part of the marzipan roll. Let the chocolate set, before you turn the roll upside down.
  6. Coat the bottom of the marzipan roll with tempered dark chocolate. Let the chocolate coating set, before you turn the roll around again.
  7. Finish by adding pecan nuts on top of the marzipan roles using tempered dark chocolate as "glue" to stick the pecans on.

Christmas market at Fulby ceramic


Saturday one week ago my mother and I had a tour to Sealand visting both some old family members of my mother, Sorø kunstmuseum and the Christmas market at Fulby ceramic

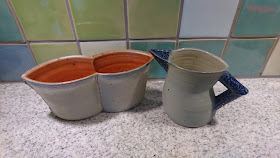
Ever since I first meet Fulby ceramic at CLAY I have been impress by their ceramic pitcher, which are cut open after the first of the process to add in pour spout as well as the handle. However, all these ceramic pitchers were sold out, when I saw the exhibition at CLAY.

However, my mother located, that the ceramic workshop of Fulby was/is open in the week-ends in the run up to Christmas, therefore we decided to drive by to have a look. 
This time I did not buy any ceramic vases at all !!! BUT I found a small ceramic pitcher and flower bulb pot, and yes both ceramics have the colour of green :-)

The Christmas fair in also open is this weekend.


December 14, 2018

Christmas Calendar 2018 - Christmas gin tonic by "We do gin"


One week to go before it Christmas vacation, not that I am counting the days until I get Christmas from work (5½ working days from now).

What better way to celebrate the approaching week-end as well as Christmas vacation than by enjoying a gin tonic Christmas style.

Like you can sign up for a weekly or monthly box of fruit and vegetable, I have also located, that you sign up for a monthly box of gin tonics !!! Which I have done:-) A box for single box contains 2 x 5 cl gin & 2 x 20 cl tonic and selected dried infusion items.
If you want to try it out, when you use this reference link, where I can get a discount of 50 DKK, if you make a booking.
Recommendations link: https://www.wedogin.dk/ref/kirsten.lauridsen/, if you to try out a monthly box of gin tonic
Hnevisningslink: https://www.wedogin.dk/ref/kirsten.lauridsen/ hvis du kunne tænke dig at afprøve en månedskasse på gin tonics.

Another gin tonic with a Christmas twist is this citrus & cinnamon gin tonic

Anyway the topic for the monthly gin tonic box for December is off cause Christmas. And here I have enjoyed this gin tonic with cloves and oranges:

Christmas gin tonic by "We do gin": - 1 gin tonic

  • 5 cl il mio gin boun natale
  • 20 cl Ledger's tonic tangerine
  • cloves
  • dried orange slices
  • ice cubes
  1. Add the gin into your long drink glass.
  2. Add in the cloves and dried orange slices, let it infuse the gin for minimum 2-3 minutes
  3. Add in ice cubes
  4. Fill in the tonic on top.
  5. Cheers and enjoy the week-end :-)

December 13, 2018

Christmas Calender 2018 - Lucia buns


Today is Lucia day a day of singing girls in white dresses and candlelight in their hands. Besides from the singing and the candles you should also eat Lucia buns (buns with saffron) known as Lussekatte in Sweden, where the day of Lucia is an even bigger event than here in Denmark.

As starting recipe for the bun I used this recipe on classic buns, which really have become my favorite bun recipe. Another recipe on Lucia buns could be this Swedish lussekatte recipe or you could try this recipe on saffron pot buns.

How to roll the bun into the right shape you can below on these photos:


Lucia buns: 18-20 buns
  • 650 g wheat flour
  • 50 g sugar
  • 125 g butter - soft
  • 50 g fresh yeast
  • 1 egg
  • 8 g salt
  • 250 g full-fat milk
  • 0.25 g saffron
  • egg wash for glazing
  1. Weigh all the ingredients directly into the mixing bowl of the stand alone mixer. Keep salt & sugar away from the yeast.
  2. Place the bowl on the stand-alone mixer.
  3. Start knead the dough at speed 1 for 8 minutes.
  4. Afterwards increase the speed to 4, knead for 2 minutes. Check the consistency of the dough. If it is not OK, when knead it at speed 4 for another 2 minutes. Again check the consistency. If needed, knead again for 1 minute and when check consistency of the dough.
  5. Remove the dough from the mixing bowl and place it on the kitchen table sprinkled with flour.
  6. Let the entire dough raise for approx 30-40 minutes under a damp cloth.
  7. When you evaluate, that the dough has raise enough, divide the dough into smaller pieces with a weight of 75 g each.
  8. Shape the dough pieces into the shape of Lucia bun look at the photos above
  9. Place the bun pieces on the baking tray covered with baking parchment. 
  10. Let the bun raise for second time for approx 40 minutes under a tea towel.
  11. Heat up the fan oven to 180'C.
  12. Bake the bun at 180'C for 15 minutes, turning the baking trays around after 10 minutes to get an even baking.
  13. Cold down the buns, before serving them with a nice cup of tea/coffee.

December 12, 2018

Christmas Calendar 2018 - Bringing light into a dark time


We are close to the shortest day of the year (21 December), so right here and now we have daylight for approc 7 hours per day !!!! Therefore many Danes will be having small fairy light outside the house, so you some kind light in the dark Winter season, where you leave home to go to work, when it is dark and it is dark again, when you return home from work.
You can also use various light chains running on battery to light up various of your indoor Christmas decoarations, so you do not have to run around lighting all the many tea lights every evening. Instead you just turn on the light chain :-)