May 31, 2014

"Take away" from Vedelsborg


When you invite guests for dinner you have to take a crusial decision ! Will you make the food on your own, will you ask the guests to bring the food with them (concept applied for illumination evenings in the garden) or will you buy some "take-away" food ???

For my birthday dinner for family and friends taking place last Saturday, I decided to apply the third option, leaving my the choice of finding a restaurant making menus as "take away". And here I stumbled over a local restaurant called Vedelsborg, where you get their season menus as "take away" food.

It possible to mix between choice of starters and main course, so in theory the entire party did not have to eat the same menu. Well knowing my guests very well, this was not a option, I would use, as the guest would argue (in friendly matter), who could which of the three different starter options and the three different main course options. So everyone was served the same food !!!

I picked up the food one hour, before the guest arrived. And here I received very good oral guidance as to how the food should be prepared. Everything was very easy in the context, as all the food for heating should either be heated up in the oven at 200'C or boiled for a few minutes. And if I became uncertain, I should just call the restaurant.

As starter we had fresh peeled shrimp with steamed white asparagus and chervil mayo and crusty bread. An excellent tasting spring starter.

The main course was roasted breast of guinea fowl and fried souffle, served with peas and carrots tossed with onion and bacon and small potatoes with herbs and lemon cream sauce. Uuuhhmmm yet another spring themed dish with great taste.


The final touche was vanilla panna cotta with raspberry jelly and strawberry and white chocolate. Great combination of taste and texture.

A three course "take away" menu costs 250 DKK, which is great value for money. I will give this meal 5 BIG stars.

For the coffee and tea I served home-made cream cake with strawberries and hazelnut cake plates.

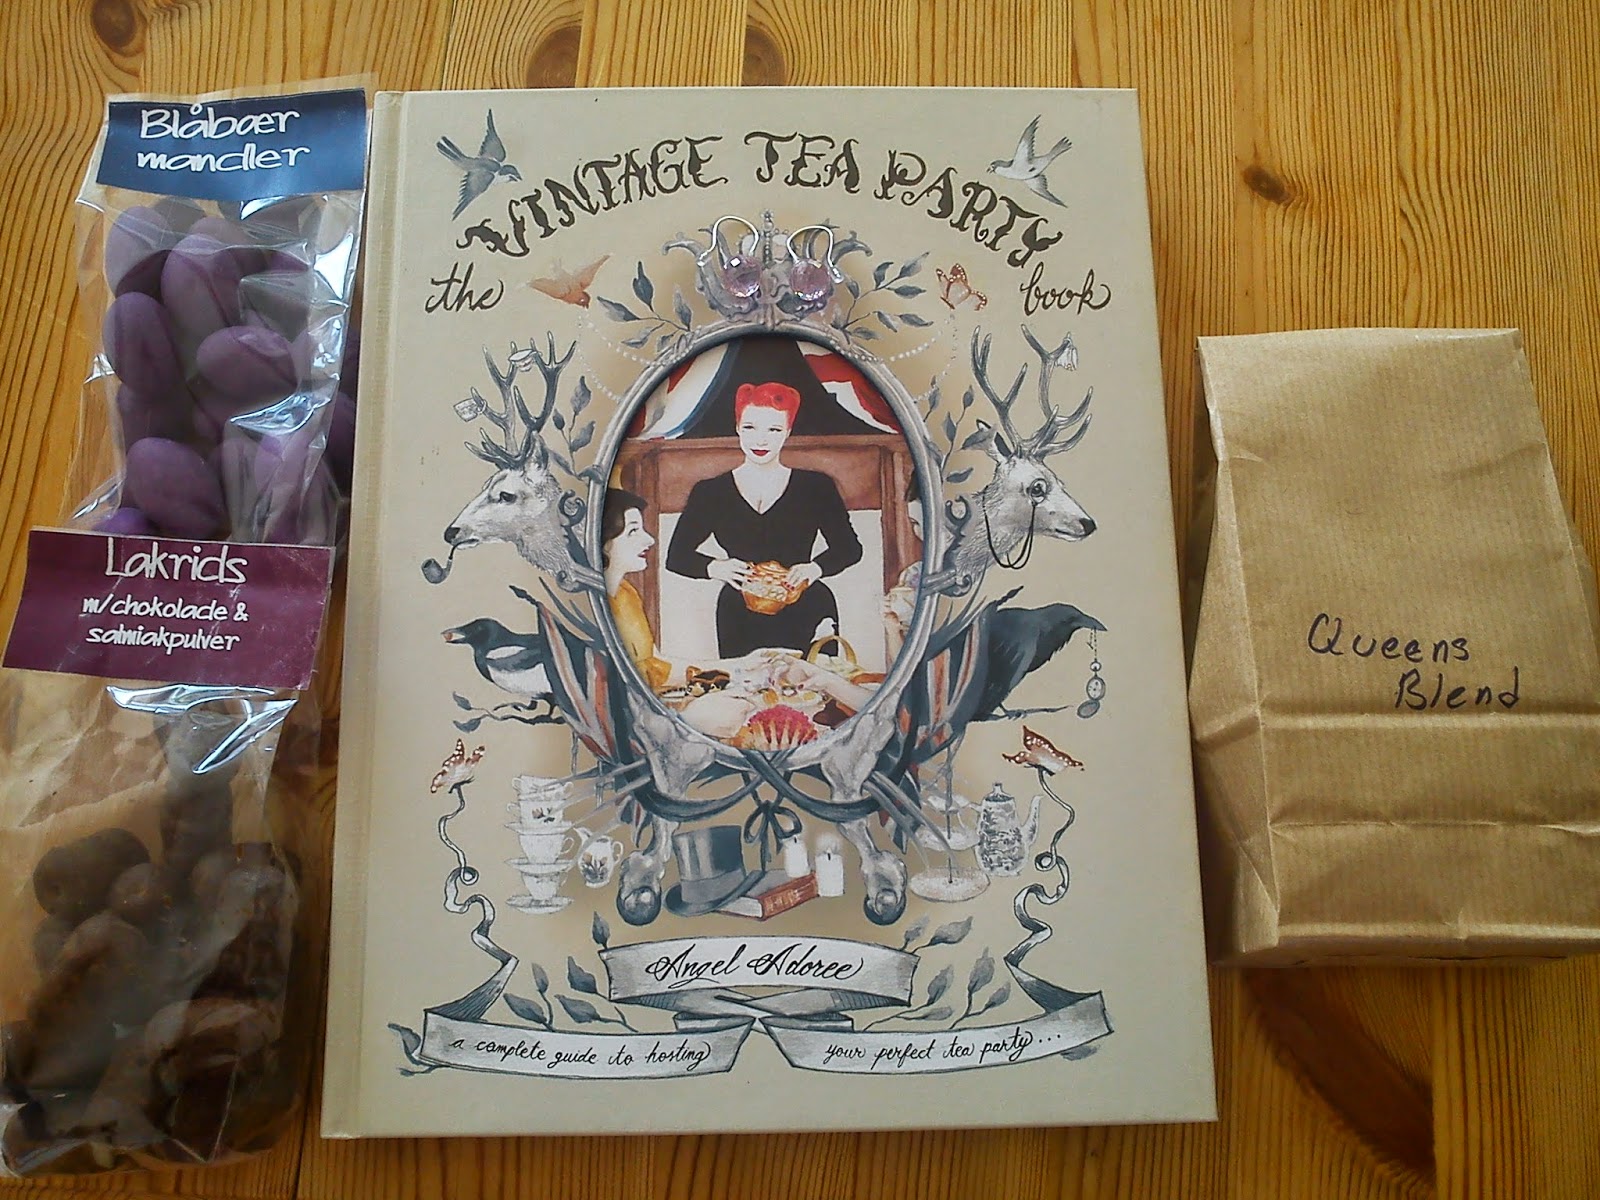
I was treated to some great birthday presents by my family and friends such as tea, various almonds, rose colour earrings and an interesting afternoon tea cooking/baking book called "The Vintage Tea Party". So I have something to drink, eat, read and wear :-)

May 30, 2014

Cream cake with strawberries and hazelnut cake plates


As part of my birthday celebration for family and friends I made this cream cake with strawberries and hazelnut cake plates using a recipe as recipe from the magazine Isabellas issue 03/2014. The original recipe is on a strawberry ice cream cake, which I turned in a more traditional cream cake using gelatine sheets in the cream filling.

This cake is not quick thing to do, as you have to bake the hazelnut cake plates as the very first step. And when you need to have time enough for the cream filling to gel in the refrigerator after putting the entire cake together.

The use of mashed strawberries into the cream cake filling is giving a excellent fruity and refreshing taste to balance all the whipped cream.

Cream cake with strawberries and hazelnut cake plates: - 10-12 servings

Hazelnut cake plates:

  • 4½ pasteurised egg white
  • 125 g sugar
  • 15 g (cake) wheat flour
  • 125 g hazelnuts - finely blended
Cream cake filling:

  • 350 g strawberries - use 50 g for cake decoration
  • 6 pasteurised 6 egg yolks
  • 100 g sugar
  • 1 vanilla pod - only the corns
  • 5 dl dairy whipping cream
  • 5 leaves of gelatine

Hazelnut cake plates:

  1. Heat up the (conventional) oven to 185'C.
  2. Start by drawing around the bottom plate of a spring form (22 cm) on baking paper, 3 circles in total.
  3. Whip the egg whites on a stand-alone mixer, until they almost firm.
  4. Add the sugar into the egg white, continue to whip, until the mass has a chewy consistency.
  5. Gently stir in the blended hazelnut and wheat flour.
  6. Divide the mass between the three circles.
  7. Bake the cake plates at 185'C in the middle of the oven for 25-35 minutes, until the cake plates are golden in colour.
  8. Cool down the cake plates.
Cream cake filling:

  1. Place the gelatine sheets in a bowl with cold water for approx. 10 minutes.
  2. Mash the strawberries with a fork.
  3. Whip egg yolks, sugar and vanilla corns into a foamy mass using an electrical beater.
  4. Whip the dairy cream in whipped cream.
  5. Gently stir the whipped cream together with the egg yolk and sugar and mashed strawberries.
  6. Remove the gelatine sheets from the water.
  7. Place the gelatine sheets in a bowl placed in cooking pot with boiling water. Let the gelatine sheets melt.
  8. Remove the melted gelatine sheets from the water bath.
  9. Stir in a small amount of the cream cake filling into the melted gelatine, while you stir well. Afterwards you stir the gelatine mass into the rest of the cream cake filling, stirring well.
Cream cake:
  1. Coat the spring form with cling film.
  2. Place a hazelnut cake plate in the bottom of the spring form.
  3. Fill ½ the cream cake filling on top of this cake plate.
  4. Place another cake plate on top on top of the cream cake filling.
  5. Fill the remaining cream cake filling on top of the second cake plate.
  6. Put the third and final cake plate on top of the cream cake filling.
  7. Place the entire cream cake in the refrigerator for min. 5 hours, so the cream cake filling has time to gel.
  8. Before serving the cream cake, remove the cake from the spring form.
  9. Decorate the top cake plate with strawberries or other fresh Summer fruit.

May 25, 2014

Lunch at "Rut på Skäret"


My mother and I have an Easter tradition, that we every Maundy Thursday drives a tour to Sweden for some outlet shopping in Höganäs followed by eating lunch in the area around Kullan. Here we have found a nice little place called "Rut på Skäret", which is wood building located in the middle of nowhere very close to the water.

The menu card is something two starters, three main course and three dessert reflecting the season. So for Easter the main courses were omelets, lamb and salmon. And rhubarb was one of the desserts.

As main course I went for lamb meat served together with fresh vegetable like turnip, small carrot, potatoes and asparagus. Uuuhmmm - visual nice for the eyes and great taste in the mouth. The dessert was a rhubarb cream brule with a fantastic flavour served with rhubarb compote, meringue and a few fresh fruits like strawberry and raspberry.

I paid 400 SEK for main course, dessert and a glass of white wine. I will give this meal 5 stars. We will be back Easter 2015 :-)

May 23, 2014

Liquorice cookies with cranberries


Today it is my birthday, which even Google has celebrated for me  with plenty of cakes:-) a very appropriate picture taking the content of this blog into consideration !!!

Besides from hiking, I have been making preparation for coming birthday celebrations, where family, friends and rowing friends are coming around.

And for such an occasion there is need for something to eat. Cookies are always an easy thing to bake for guests, as they can be prepared in advance. The only drawback is, that I have to keep my fingers away from the tins with the cookies inside, so where still are cookies, when the guests are situated in my living room !!!

You can easily use this cookie dough as a hostess gift, as you can wrap the dough including the baking instruction, so the hostess/host afterwards can bake her/his own home-made cookies.

The starting recipe for these cookies is Markus Grigos lakrids-tranebæer småkager. I have made two modifications to this recipe. I have added into some salt to boost the overall flavour and the second modification is, that I am using a combination of English liquorice powder and raw liquorice powder to enhance the liquorice.

My good friends in Horsens are already now dreading to taste these cookies, when they hear, that I have been making modification on the liquorice, as they have a lower threshold for liquorice than I have. This afternoon tea with focus on liquorice is still standing clear in the minds of my good friends in Horsens !!!

UPDATE 2 March 2015:
These very Danish tasting cookies are being forward for the monthly blogging event Tea Time Treats having the theme of biscuits and cookies. Tea Time Treast is managed by Karen from Lavender and Lovage and Jane from The Hedge Combers.


Liquorice cookies with cranberries:
  • 500 g (cake) wheat flour
  • 1 teaspoon baking powder
  • ½ teaspoon salt
  • 50 g English liquorice powder
  • 2 teaspoons raw liquorice powder
  • 125 g dried cranberries
  • 375 g cold butter - diced in small squares
  • 500 g sugar
  • 2 eggs
  1. Sieve the wheat flour and baking powder in the mixing bowl. Add in the salt, cranberries, liquorice powders, butter squares.
  2. Mix on KitchenAid using the K-spade on speed 3-4, until the butter has disappeared into the cookie dough.
  3. Add in the sugar and eggs. Mix until the cookie dough just gathers. Over mixing will give cookies with less crispness.
  4. Divide the dough into 3 portions of 500 g each.
  5. Roll the cookie dough into longer strings. Cover each cookie string in baking paper.
  6. Place the cookies dough cold, either in the refrigerator or freezer.
  7. Heat the (conventional) oven to 200'C
  8. Cut the firm cookie dough into slices of 1 cm.
  9. Place the cookies on a baking tray covered with baking paper.
  10. Bake the cookies in the upper part of the oven at 200'C for 8-10 minutes.
  11. Cool down the cookies, before storing them in airtight containers.

May 22, 2014

Food shopping in Sweden


My mother and I have an Easter tradition, that we every Maundy Thursday drives a tour to Sweden for some outlet shopping in Höganäs followed by eating lunch at Rut på Skäret. At one of the outlet shops in Höganäs you can buy apple juice from Kullamust.

I knew from my previous shopping back in 2013, that I really like the taste of this apple juice, as it taste like drinking a real apple. I find it tricky to buy apple juice, as you many times get a product tasting like artificial apple something. Actually I find more difficult to buy a good apple juice compared to buying orange juice !!!

Well, I decided to buy a wooden box loaded with 12 x 750 ml bottles in three different flavour options. The classic apple juice, a proven combination from the baking kitchen in apple with cinnamon  and a more traditional option of apple and pear juice.

May 20, 2014

Curry with plenty of vegetable


Ever since I have been living in the England, I have been a big fan of a good curry with medium strength of spiciness. And making a curry allows you to "get ride" of various vegetable left-overs in your refrigerator in a delicious tasty way.

Chicken curry with vegetable: - 4 servings
  • 280 g chicken breast – chop in chunks
  • 2 tablespoons oil
  • 2 tablespoon green curry paste
  • 2 teaspoon dark syrup
  • 1 tablespoon pickled ginger – diced
  • 1 tablespoon pickled ginger syrup
  • 1 x 400 g coconut milk
  • 1 romanesco or broccoli - cut in small florets
  • 400 g Edam beans
  • 3 carrots - sliced
  • 250 g mushrooms - sliced
  • 2 pepper fruits - sliced
  • 1 x 400 g diced tomato
  • coriander
  1. Heat up the oil in a large cooking pot. Fry the chicken chunks.
  2. Add the curry paste and let it fry together with the chicken for a short period.
  3. Add the syrup, ginger and ginger syrup and coconut milk and tomato, let it simmer for 15-20 minutes.
  4. Afterwards add the romanesco/broccoli, Edan beans, carrots, pepper fruit and mushrooms, and let simmer for another 5 minutes.
  5. Season with coriander.
  6. Serve together with rice.

May 18, 2014

Buns with carrot and sunflower seeds


I need to re-stock my freezer more frequently during the rowing season compared to Wintertime, as buns are an easy way to bring food, when going rowing right after work.

I have grated carrots and sunflower seeds for these buns, as a way of changing taste and texture of a standard bun recipe of the "usual" 1000 g flour to 700 g liquid such as water, milk or buttermilk. Instead of buttermilk you could use plain tap water, but I had some buttermilk standing in my refrigerator, which I needed to use instead of throwing it out.

After the first raising process at ambient temperature, you can store the bun dough cold in the refrigerator for 2-3 days, allowing you to have freshly baked bun every day in an easy way.

Buns with carrot and sunflower seeds: - 22-24 buns
  • 30 g salt
  • 25 g yeast
  • 300 g whole grain wheat flour
  • 700 wheat flour
  • 2 tablespoons honey or sugar
  • 350 g buttermilk/thick milk
  • 350 g water
  • 250 g carrots - grated
  • 100 g sunflower seeds
  1. First add the yeast, flours and salt into the mixing bowl of the mixer.
  2. Start to whip on low speed, slowly add in the buttermilk, water and honey. Knead the dough on the mixer for 8 minutes.
  3. Add in the grated carrots and sunflower seeds and knead for another 2 minutes
  4. After the kneading process, let the dough raise warm for 1-1½ hour.
  5. Divide the dough into equal size buns, I always a kitchen scale for this purpose in order to ensure equal baking of the buns, I target a dough amount of 80-90 g per bun.
  6. Place the buns a baking tray covered with baking paper, and let the buns raise for another 45-60 minutes.
  7. Heat up the (conventional) oven to 200'C.
  8. Bake the buns at 200'C for 30 minutes in the middle part of then oven.

May 17, 2014

Hveder med marcipan for Store Bededag - wheat buns with marzipan for Great Prayer Day


 Yesterday it was Great Prayer Day (Store Bededag), anyway I am huge fan of these wheat buns, which we traditional eat in connection with Great Prayer Day, so therefore I have been baking yet another portion of "hveder", this time using the recipe on "hveder" with marzipan from Odense Marcipan.

I made the following modification: reducing of the vanilla sugar, so the taste is not too sweet, reducing the amount of yeast and finally been using a combination of plain wheat flour and whole grain wheat flour.

Hveder med marcipan for Store Bededag - wheat buns with marzipan for Great Prayer Day
Before steam treatment in the oven
  • 50 g butter - melted
  • 250 g milk
  • 15 g yeast
  • 1 egg
  • 1 teaspoon vanilla sugar
  • 1 teaspoon salt
  • 150 g marzipan - grated
  • 150 g whole grain wheat flour
  • 3500 g wheat flour 
After 30 minutes steam treatment in the oven
  1. Add melted butter, milk, water and yeast in the bowl on the mixer. Mix slowly (speed 1) for ½ minute.
  2. Afterwards add in eggs, salt, marzipan and vanilla sugar, mix slowly (speed 1) for ½ minute.
  3. Pour in the flour, continue to knead the dough on speed 2 for 7-8 minutes.
  4. Place the dough in bowl with a closing lid, let the dough raise for 2 hours.
  5. Divide the dough in equal sizes of 70-80 g. Place the bun pieces in a baking tray covered with baking paper.
  6. Place the baking tray with dough in the oven without heat together with another tray filled with boiling water. Let the buns raise and "grow" together in the steam for 30 minutes.
  7. Take water and bun dough out of the oven.
  8. Heat up the (conventional) oven to 200'C.
  9. Bake the buns in the baking tray at 200'C for 30 minutes placed in the middle part of the oven.
  10. Cold down the buns
  11. Cut the wheat bun into 2 pieces - lets those roast at 200'C for 6-8 minutes
  12. Served hot or cold together with butter - plenty of butter, cheese and some fantastic home-made jam.

May 15, 2014

Hveder for Store Bededag - wheat buns for Great Prayer Day


This evening is the evening before Store Bededag (Great Payer Day) (a Danish religious holiday celebrated on the 4th Friday after Easter). And it is the peak evening for enjoying roasted "hveder" - wheat buns with cardamon.

Having discovered the great taste of home-made "hveder", where is no turning back for commercial baked "hveder". The combination of freshly grounded cardamon covering your kitchen in wonderful flavour and eating freshly baked/roasted buns is a combination made in heaven !!!

Previous years I have been using this recipe on "hveder", however I like to taste new versions of classic recipes, so this year I have located this recipe hveder from the blog "Maden i mit liv". I have the following adjustments to the original recipe. As usual I reduced the yeast amount from 50 g to 25 g to minimise the yeast flavour notes, I added vanilla sugar to boost the overall taste and finally I have used a combination of "plain" wheat flour and whole grain wheat flour.

It is as well the first time, that I have used steam from boiling for the second raising of the bun dough inside the oven prior to baking the buns. And it was quiet amazing to see, how the volume of the buns were increased during this way of making the second raising. Therefore I think, that I will using the method for my coming baking of buns.

"Hveder" with inspiration from "Maden i mit liv": - 25 buns
  • 100 g butter - melted
  • 250 g water
  • 250 milk
  • 25 g yeast
  • 2 eggs
  • 2 teaspoon salt
  • 2 tablespoons sugar
  • 2 teaspoons cardamon
  • ½ teaspoon vanilla sugar
  • 300 g whole grain wheat flour
  • 700 g wheat flour
  1. Add melted butter, milk, water and yeast in the bowl on the mixer. Mix slowly (speed 1) for ½ minute.
  2. Afterwards add in eggs, salt, sugar, vanilla sugar and cardamon. mix slowly (speed 1) for ½ minute.
  3. Pour in the flour, continue to knead the dough on speed 1 for 10 minutes.
  4. Place the dough in bowl with a closing lid, let the dough raise for 2 hours.
  5. Divide the dough in equal sizes of 80-90 g. Place the bun pieces in a baking tray covered with baking paper.
  6. Place the baking tray with dough in the oven without heat together with another tray filled with boiling water. Let the buns raise and "grow" together in the steam for 30 minutes.
  7. Take water and bun dough out of the oven.
  8. Heat up the (conventional) oven to 200'C.
  9. Bake the buns in the baking tray at 200'C for 30 minutes placed in the middle part of the oven.
  10. Cold down the buns
  11. Cut the wheat bun into 2 pieces - lets those roast at 200'C for 6-8 minutes
  12. Served hot or cold together with butter - plenty of butter, cheese and some fantastic home-made jam.

May 14, 2014

Ramson oil a la Klidmoster


For another monthly blogging challenge called "Cooking with herbs" hosted by Karen from the lovely Lavender and Lovage, Karen has selected fresh herbs as theme for May 2014 fresh herbs as the theme for May.


I do not know, if I am bending these rules working with ramson, which has become a very trendy ingredients within Nordic cooking for the last couple of years.

You can either pick your own ramson in the forest or you can buy it the supermarket.If you pick your own ramson, you have to be very certain it is ramson, that you take home with you to your kitchen, as ramson and Lily of the Valley looks very much like each other. Ramson being OK to eat, whereas Lily of the Valley is quiet poisonous to eat. I am not a huge botanic, so I decided to pick my ramson in the supermarket, even though it is on my To Do List 2014 to pick my own ramson out in reality !!!

I have found this lovely recipe on ramson oil on the blog "Klidmoster", which I decided to use, when making my first attempt on ramson oil.

The oil ends up having the most amazing wonderful fantastic green colour, and the flavour in the kitchen as you sieve the oil through the coffee filter is also peticular, but pleasant.

Ramson oil a la "Klidmoster":
  • 50 g ramson leaves
  • 200 g olive oil
  • 66 g avocado oil
  • ½ teaspoon of salt
  1. Start by cleaning the ramson leaves in water, followed by patting the leaves dry, so the water activity will remain low in the oil. Low water activity equals long shelf-life !
  2. Add all four ingredients into a blender glass and blend everything into liquid looking grass soup.
  3. Let the ramson leaves infuse the oil cold in the refrigerator for 5 hours.
  4.  toxic looking mass.
  5. Sieve the oil through a medium fine sieve. First by letting the oil run on it´s own, and afterwards by pressing gentle with a spoon. The remaining ramson pulp can be used in ramson pesto.
  6. Next day let the oil pass through another very fine sieve or a coffee filter placed in a funnel to remove any leftover pulp part of the ramson. The part of the process takes around 12-14 hours.
  7. Pour the oil into a clean bottle, which is stored dark.

May 13, 2014

Ramson pesto with pine nuts


For the monthly blogging challenge called "Cooking with herbs" hosted by Karen from the lovely Lavender and Lovage, Karen has selected fresh herbes as theme for May 2014 fresh herbs as the theme for May.


I do not know, if I am bending these rules working with ramson, which has become a very trendy ingredients within Nordic cooking for the last couple of years. You can either pick your own ramson in the forest or you can buy it the supermarket. If you pick your own ramson, you have to be very certain it is ramson, that you take home with you to your kitchen, as ramson and Lily of the Valley looks very much like each other. Ramson being OK to eat, whereas Lily of the Valley is quiet poisonous to eat.

I have used this recipe on ramson pesto with walnuts, which I like very much due to the high leaves of green stuff compared to the oil part. As I had some roasted pine nuts ready for use in my kitchen, I decided to exchange the walnuts with pine nuts.

Ramson pesto with pine kernels:
  • 50 g ramson leaves - clean
  • 50 g pine nuts - roasted
  • 30 g Parmesan - freshly grated
  • ½ dl oil - I used rape seed oil
  • any leftovers from the ramson oil
  • salt & pepper
  1. Wash the ramson leaves in water, followed by patting the leaves dry with kitchen towles, so the water activity will remain low in the pesto. Low water activity equals long shelf-life !
  2. Add everything into a blender glass and blend everything into a homogenous mass. 
  3. Season with salt and pepper
  4. Store either in the refrigerator or in the freezer, if you will not use this pesto at once.

May 11, 2014

Spring pie with asparagus and goat cheese


I felt like making a pie for dinner with asparagus and goat cheese, so I simply googled "pie with asparagus and goat cheese" and this google search let me to Twin Food - spring pie with asparagus and goat cheese.

I decided to make the following changes: I went for a ready-to-use pie dough brought in the super markets, I used all the cottage cheese in the smallest packing size available in the super market, so I was left with a small amount of cottage cheese in the refrigerator afterwards, which easily could end up thrown in the bin. And I finally I decided to add some Dijonnaise as well in the pie fillings, as I felt like it.

So this pie besides from serving as my dinner also could my contribution for the monthly blogging event called "Tea Time Treat"  managed Karen from Lavender and Lovage and Jane from The Hedge Combers. The May theme of "Open Top Tarts, Pies and Quiches"  has been selected by Jane from The Hedge Combers.


Spring pie with asparagus and goat cheese a la Twin Food:
  • pie dough - I used a ready-to-use dough
  • 100 g goat cheese - thinly sliced
  • 250 g green asparagus
  • 3 eggs
  • 250 g cottage cheese
  • 1 teaspoon Dijonnaise
  • salt and pepper for seasoning
  1. Cover the pie form with the pie dough.
  2. Lay a bottom layer of green asparagus on top of the pie dough.
  3. Stir cottage cheese, eggs, Dijonnaise, salt and pepper well together, pour it on top of the asparagus.
  4. Place the goat cheese slices on top.
  5. Bake the pie at 200'C for 30 minutes  in the middle-upper part of the (conventional) oven.
  6. Served together with fresh salad and cold glass of white wine.

May 10, 2014

Meat balls in curry sauce


Meat balls in carry sauce served together with rice known as "boller i karry" has been a favourite dish of mine since childhood. I must admit that I have not located the best recipe yet for this dish, but this recipe is getting pretty close to being a favourite. However, I still need to fine tune the level of curry flavour in the curry sauce, but the taste of the meat balls are perfect.

I have located this recipe here: Newyorkerbyheart boller i karry fra Go Morgen Danmark, and I have made no changes to the recipe besides, from letting the meat ball mass stand cold for ½ hours prior til boiling them.

In my opinion the curry sauce could use some more curry. And addition of some chopped lemon grass could also be interesting to try another time.

Meat balls in curry sauce:  - 4 servings
Meat balls:
  • 500 g mince meat of veal and pork
  • 1 small onion - finely chopped
  • 1 egg
  • 1 dl sparkling water
  • ½ teaspoon ground coriander
  • 1 teaspoon cumin
  • 1 tablespoon medium curry
  • salt
  • pepper
Curry sauce:
  • 2 tablespoons olive oil
  • 1½ tablespoon curry
  • 30 g fresh ginger - grated
  • 2 carrots - thinly sliced
  • 1 stalk celery - thinly sliced
  • ½ onion - thinly sliced
  • 1 apple - diced, either with or without peel, do as you like !
  • 1 tablespoon flour
  • 3 dl of the cooking water from the meat balls
  • 1 dl dairy whipping cream, 35-40% fat
  • 3 dl milk
  • salt 
  • pepper
  • rice
Meat balls:
  1. Stir the minced meat with all the other ingredients.
  2. Let the meat mass stand cold in the refrigerator for 30 minutes.
  3. Fill a cooking water with water, and bring it to the boil.
  4. Shape small balls from the meat mass, which is add to the boiling water in smaller amount. Do not overfill the cooking pot. When the meat balls are swimming in the top of the boiling water, they are done and can be removed. Leaving space for new meat balls. Save the cooking water to later use in the curry sauce.
Curry sauce:

  1. Heat up the oil in a big cooking pot and fry onion, curry and ginger in the oil.
  2. Add in the sliced vegetable and apple dices, and let it fry as well.
  3. Add in the flour. Pour in the cooking water from the meat ball little by little, stir well as it is done to avoid the lumping of the flour.
  4. Pour in the milk and cream as well.
  5. Season with salt and pepper.
  6. Cook up the curry to the boiling point. Add in the meat balls and warm then up, before serving.
  7. Serve the meat balls and curry sauce together with rice.

May 08, 2014

Carrot muffins with marzipan


From time to time I am baking muffins, as these are easy to freeze down and when defrost for a cup of tea/coffee either at home or when out rowing a longer tour. As I was having some marzipan laying around in the refrigerator as left-over I went looking for a recipe, where marzipan and eggs (having eggs getting close to the end of shelf-life) were important ingredients.

I found a recipe on carrot muffins with marzipan on the home page of Oden Marcipan (gulerodsmuffins a la Odense Marcipan), where I made three modifications. I added in some orange zest for fun, used a combination of light muscovado sugar and sugar as I did not have enough muscovado on it´s own. And finally I decided to drop the icing of cream cheese as muffins with icing are tricky to freeze down and maintain a nice look afterwards.

UPDATE 13 June 2015:
These cookies are being forward for the monthly blogging event Tea Time Treats having the theme of muffins, fairy cakes and cupcakes Tea Time Treast is managed by Karen from Lavender and Lovage and Jane from The Hedge Combers.


Carrot muffins with marzipan: - 14 muffins
  • 225 g butter
  • 115 g light muscovado sugar
  • 185 g sugar
  • 4 eggs & 1 egg yolk
  • 150 g marzipan - grated
  • 250 g carrot - grated 
  • 1 orange (organic) - only the zest finely chopped
  • 1 tablespoon cinnamon
  • 1/2 teaspoon ginger
  • 2 teaspoons vanilla sugar
  • 200 g (cake) flour
  • 1 teaspoon bakingpowder
  1. Heat the (conventional) oven to 180'C
  2. Melt the butter.
  3. Whip sugar and sugar into foamy eggnog. 
  4. Stir grated marzipan and carrot into the eggnog.
  5. Mix spices, baking powder and flour together. Sieve this mix into the muffin dough.
  6. Stir in the melted butter as well.
  7. Pour the muffin dough into muffin form. 
  8. Bake the muffin at 180'C for 25 minutter in the middle of the oven.

May 06, 2014

Dinner at Remouladen


One month after the start of the rowing season the female group of tour rowers decided it was time to celebrate the rowing season by first rowing a "small" tour of 15 km followed by having dinner at "Remouladen", which has moved from the city centre of Vejle to the marina of Vejle.

We had booked a table by the window, so we could get an excellent view over the area of the marina. The first thing, which the short-legged persons noticed about the dining chairs was, that the chair was so high, that they could not reach the floor with their feet !!!

At many more high-end restaurants, there will normally be served some bread with either butter and/or oil, well this was not the case here ! The person ordering both a starter as well as main course was served bread, and she when requested more bread for the rest of the table !!! We were when served a small basket of bread for sharing = one piece of bread per person.

We were ordering a mix of beer, soft drink and wine for every one for our meal incl plain tap water. However, it is impossible to be served tap water at Remouladen !!! So we had to order water on bottle, 1 l for 45DKK. I can understand, if the people eating at the restaurant was only drinking tap water, that you had to pay for tap water (something like 10 DKK per person is the normal going rate else where). If you have to drive by car after eating, you can not drink more than 1 glass of wine, so you need something to quench the thirst such as tap water !!!

I choose to eat a main course of cod from the North Sea fried in butter, served together with with sauce Choron (hollandaise sauce flavoured with tomato and red wine), crunchy vegetables and small salt potatoes. The fish was great and the sauce was excellent in both texture and taste. However, I would have expected the potatoes to warm, they were cold during serving.

We finished of the meal by drinking tea and coffee. For once, this is a restaurant understanding the demand of keen tea drinkers. The tea was not made from tea bags, but from loose tea leafs and the tea water had the correct temperature. Something which other restaurant and cafes could learn from !!!

I paid 355,50 DKK for main course, glass of white wine, tea and spring water. I will give this meal 3 stars, as the price level is not fitting with the service level expected.

I have before been eating lunch before at Remouladen and I have also been serving their open sandwich as take-away at home. However, I feel disappointed this time, as price and service is not fitting together. So during out last training session we all agreed in the boat, that next time we will find another place to eat, when we have to "celebrate" the stop of the outdoor rowing and start of indoor rowing.

May 03, 2014

Soft boiled liquorice caramels


I still had some overdue dairy cream left after I had cooked these orange caramels, so I cooked an new version of these liquorice cream caramels adjusting this recipe on  soft boiled caramels by Mette Blomsterberg, so the caramels actually had a taste of liquorice !

Soft boiled liquorice caramels: - 30 caramels
  • 70 g butter
  • 210 g dairy whipping cream, 35-40% fat
  • 250 g sugar
  • 40 g sweet liquorice syrup
  • ½ teaspoon raw liquorice powder
  • 50 g glucose syrup
  1. Add all the ingredients into a small cooking pot.
  2. Stir continues, as the caramel mass is heated up, until the temperature reach 121'C.
  3. Fill the caramel mass into small alu- or paper-form.
  4. Place the caramels cold, until they cooled down.
  5. Store in an airtight container.

May 01, 2014

Welcome to May - the blooming month of Spring


Welcome to May - the blooming month of Spring

Spring is blooming full speed ahead here in 2014. The fields of rape seeds are lighting up the surrounding landscape at least 3 weeks, before they normally used to vibrant yellow. Our national tree (beech) have been unfolding the leaves ahead of schedule. And from to day to day I can see, that the peonies in my little park are growing several inches each and every day.

Late in April I have been planting potatoes again in pots as last year, and before I plant herbs like parsley and basil the weather needs to maintain it´s positive signs without any nights with temperatures below the freezing point. So perhaps mid or end of May I will be expending again with more herbs in my little kitchen garden. The tomatoes will first be planted end of May, as they as well have to live outside on the terasse.

For me the month of May is a combination of family birthdays incl my own and all the wonderful opportunities of working with freshly picked rhubarb in the kitchen. Therefore I will be sharing the two most popular recipes from my blog with rhubard inside.

The big question mark is, when will we start to see the blooming elder flowers ? Start, mid or end of May, as everything else are so much in advance.


LinkWithin

Related Posts Plugin for WordPress, Blogger...