February 29, 2012

Tea Time Treat February 2012 - Valentine Romance Scones


It was very exciting for me to see, that my entry in form of Valentine Romance Scones found a place on the February Tea Table together with 43 others Tea Time Treats, all having focus on ROMANCE celebrating Valentines Day.


I decided to bake scones using Amarena Fabbri cherries and white chocolate as my "translation" of typical Valentine gift as well as love to fit with the ROMANCE theme. Both my afternoon tea guest, work colleagues and I did fall in LOVE with the tasty flavour combination.

I am eagerly awaiting to see, what the theme should be for tea table in the coming month of March. Rest assure, that I will keep you posted on my coming contribution to Tea Time Treat.


February 28, 2012

Shopping for snow drops

The outcome of shopping for my little garden

Which Hellebore to choose ?
This week-end my mother and I went shopping for some new snow drops for my garden at the nursery called Gartneriet Spiren located close to Skælskør on Sealand. This nursery also has a large production of Hellebore in many different variations.

As I already have quiet many very dark coloured Hellebore I found some Hellebore plants with white and green flower, either as single flower or double flower. I will post some pictures later on, when I have planted them.

Wonderful display of snow drops and Hellebore (Easter bells) at Gartneriet Spiren

This double flower snow drop I got in 2011 from a colleague´s  garden
Sunday afternoon I was actual able to sit outside in my garden drinking a nice cup of tea, while I enjoyed the on-going blooming. It was such a beautiful winter day or perhaps I should rather write spring day with plenty of sun shine and no wind at all.

I took a close look at the snow drops and winter aconite being blooming.

Snow drops sun bathing
So now I have locate some "free" spots in my garden, where I can plant the new snow drops
Winter aconite in sunny "face"


Crocus in the grass
I also spotted some crocus popping their heads up in my lawn, so now I have to be careful, while walking on the grass. I have a dream about my lawn should look like Hyde Park during spring time with tons of crocus.At the time being I have planted 500 crocus in the lawn, so this spring I have to see, where more crocus are needed.

February 25, 2012

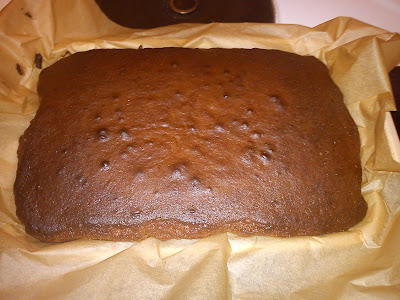
Caramel cake a la BageLIV


I will only buy one of these woman's weekly magazine here in Denmark like "Alt for Damerne" and "Femina", if I get something extra with the weekly magazine such a DVD, book, nail polish or some cooking recipes. Last week I got an extra magazine with "Alt for Damerne" called "BageLIV - februar/marts 2012" with focus on baking. And there is plenty of interesting recipes in this magazine, which I look forward to try out.

I had all the needed ingredients for this caramel cake, so I selected this cake as the starting point. I more or less always have both dark brown and light brown muscovado sugar in my kitchen. And the title of the cake is caramel cake, I decided to use the light brown version, which is having caramel taste compared to the liquorice taste of the dark brown muscovado sugar.

This cake requires quiet some attention, as you simply do not add everything into the same mixing bowl. And it is a little tricky to ensure, that flour is stir well into the butter-sugar mass without having hidden flour lumps in the cake mass.

The taste of the cake is mild and plain without any interesting flavour twist. So you are not offending anyone serving this cake, as the taste is as plain as it is.

Caramel cake a la BoligLiv:

  • 200 g butter - with salt 
  • 200 g light sugar syrup
  • 200 g light brown muscovado sugar
  • 3 eggs
  • 2 tablespoon milk
  • 300 g (cake) flour
  • 2 teaspoon baking powder
  • 1/4 teaspoon nutmeg - grained
  1. Slowly melt the butter and light sugar syrup together in a cooking pot.
  2. When the butter is melted, add the muscovado sugar into the butter-sugar mass and stir well to ensure that any muscovado sugars lumps will melt.
  3. Let the butter-sugar cool down - approx 10-15 minutes.
  4. Whip the eggs and milk gentle together.
  5. Stir the egg mass into the butter-sugar mass.
  6. Mix the flour, baking powder and nutmeg together.
  7. Mix the flour mass and butter-sugar-egg mass together into a homogeneous mass, use an electric whipper for this, as it is taking some time.
  8. Line a baking form (32 x 23 cm) with baking paper. Fill the cake mass into the baking form.
  9. Bake the cake in a conventional oven at 175'C - place the cake in the cold oven in middle.
  10. Bake at 175'C for approx 60 minutes.
  11. Cool down and serve the cake.

February 23, 2012

Bergamot - orange jam a la Årstiderne


I receive my weekly vegetable box yesterday, where I found a citrus fruit looking like an "older" lemon, which I thought was a bit unusual, as the citrus fruits normally are very, very fresh, when I receive my weekly vegetable boxes. When I found yet a second "older" looking lemon, and I started to get a bit annoyed with receiving these two "older" looking lemon.

After emptying my vegetable box I started to look into the weekly newsletter -  Årstidernes weekly newsletter week 8/2012 - and I here I saw a recipe on bergamot-orange jam. And when I realised, what my "older" looking lemons actually were bergamot citrus fruit. It is also the very first time, that I see a bergamot in "real life" !!!!! And I am a big "user" of bergamot, as I drinking pot after pot of Earl Grey tea !!!!!

One glass of this bergamot-orange jam is already set as side for an upcoming afternoon tea with focus on Earl Grey tea, as I find this jam will fit perfect into the tea menu.

So I decided to make this bergamot-orange jam a la Årstiderne right here on the spot.

As this jam is made from citrus fruit and the sugar amount is quiet high, where is not need for adding pectin gelling powder, as the citrus fruit is a natural source of pectin.

 Bergamot - orange jam a la Årstiderne:

  • 2 bergamots - organic
  • 2 oranges - organic
  • 2 tablespoon of almonds - without skin
  • 550 g sugar or 600 g sugar is more sweetness is preferred
  1. Wash the citrus fruits.
  2. Place the citrus fruits in a small cooking pot, which when is filled with water.
  3. Place the lid on the cooking pot. Let the citrus fruits boiled (softly) for 1 hour.
  4. Remove the citrus fruits and place them in a blender.
  5. Add almonds and sugar on top of the citrus fruits.
  6. Blend everything into a homogeneous mass.
  7. Prepare the jam glasses by filling them with boiling water. I do not use any preservatives in my home-made jam, so this is important to increase shelf-life of your jam. Another thing you can do is to store the jam cold afterwards. 
  8. Fill the glass with jam and close the glass.


February 21, 2012

Status on afternoon tea with focus on liquorice


I spend a fantastic, interesting and wonderful afternoon tea with focus on liquorice last Sunday with two good friends from Horsens, where we taste our way through various tea and savoury and sweet baked food. I actually managed to saturate my tea friends with liquorice and yet some more liquorice.

Wonder if English readers of this blog now will become angry with me for making liquorice the theme for this afternoon tea ?

Below you can see the three different liquorice teas, which were served in the tea pot during this afternoon:
  • Top - middle: Tea Lounge - Liquorice Love from Urtekram - liquorice root, anise seed, peppermint, lemon, star anise, basil. This tea is too herbal for me and my guests. 
  • Bottom - left: Black tea with liquorice root, anise seeds and liquorice flavour from my local tea pusher Luka. This tea was my as well as mine guests favourite
  • Bottom - right: Be Cool from Kusmi Tea - rosehipseed, apple, verbena leaves, peppermint, anise seeds and liquorice roots. This tea would be good at another occasion, but not for afternoon tea with focus on liquorice, as the liquorice taste is not strong enough.
After having filled our taste buds and stomach with all these liquorice thing, one of my tea guest had an urgent need for drinking some more normal tea, so a tea pot of Earl Grey was sincerely requested. As I have a collection of 5 different Earl Grey tea, this gave us the idea of making a new afternoon tea session having focus on Earl Grey, where I will be bringing all these Earl Grey version with me to the tea table in Horsens.


If I have some French readers out in the virtual world, I believe, that they will now put my blog and I on "Persona Non Grata -list", so I will never be able to receive any French honour at all !!!! As there was some leftovers of the sparkling wine from the Valentine sparkling cocktail, we decided to make a mix of sweet liquorice syrup and sparkling wine !!!!!

Ups, yes we did our very best to ruin the good sparkling wine and turned it into a drink with a sour beer taste. So never ever try this out in your own kitchen. Keep these two ingredients away from each other !!!!!

Lets see, if I can manage to unit the English and French with these two attacks of mine on their traditions ???


February 20, 2012

Fastlavnsbolle buffet


Continuing a "strong" tradition of only one episode within my work group (being the chocolate cake competition), a colleague and I decided to challenge the rest of colleague with "Fastlavnsbolle" competition. We decided to split the competition into a decoration part and a taste part.

We were four person out of approx 20 colleagues with Danish and Mexican background, who participated in this very first "Fastelavnsbolle" 2012 competition.

It was great to see, how my Mexican colleague had translate the Danish Fastelavnsbolle into his very own version of bun dough with a mix of cream, yogurt, coconut and pineapple !!!! He actually won the part relating to decoration of the bun.

Another colleague with a un-decorated bun (playing on the naturalness) won the competition on taste.

I became a strong number two in both decoration and taste part, so therefore I have decided (on my very own), that I was the overall winner/creator of this Fastelavnsbolle 2012 title !!!!!!

Below you can see my plate with my selection of all the different Fastelavnsboller, mine is the bun with lilac sugar coating.


February 19, 2012

Fastelavnsboller (Shrovetide bun) for selection of The Best Fastelavnsbolle at work


Today Sunday it is Fastelavnssøndag (Shrovetide Sunday) here in Denmark, which is the culmination of the season, where you are eating Fastelavnsboller (Shrovetide Bun) as well as kicking "the cat of the drum" and dressing up, if you are a child. As grown-ups it is expected, that we only eat the Fastelavnsbolle.

As Hannibal the Cat did not want to placed inside a  Shrovetide drum, he decided to guard the bun dough, while it as resting/raising after the kneading, Here I use the heated floor in my dusch for "warm" dough resting !!!!!

I have challenged my work colleagues into bringing their best home-made Fastelavnsbolle with them to work tomorrow Monday, where we select The Best Decorated Fastelavnsbolle and The Best Tasting Fastelavnsbolle. I am targeting to to be the winner of two these options !!!!!!, if the voting is going my way !!!!!!

I have found the recipe on the bun dough on the blog "Maden i mit liv". Another recipe on Shrovetide Bun with marzipan filling can be seen here here. The filling I have created from marzipan, sugar, egg, apple and orange flower extract.

Fastelavnsboller 2012 - Shrovetide buns with marzipan filling - 14 buns:

Bun dough:
  • 20 g yeast
  • 200 g milk
  • 125 g butter - melted and cool down
  • 1/4 teaspoon salt
  • 1 teaspoon cardamon
  • 1 tablespoon home-made vanilla sugar home-made vanilla sugar 
  • 100 g whipping cream - 38% milk
  • 500 g wheat flour
  • 1 egg
Marzipan filling:
  • 1 egg
  • 150 g sugar
  • 150 g marzipan 
  • 1 apple - grated
  • ½ teaspoon orange flower extract - could be left out


  1. Melt the butter and let it cool down
  2. Add the yeast to finger warm milk.
  3. Add the salt, cardamon, vanilla sugar, sugar, whipping cream and melted cooled down butter.
  4. Add the wheat flour.
  5. Knead the dough together - I normally for 10 minutes
  6. Let the raise for 90-120 minutes or the night over (when use 10 g yeast instead of)
  7. Mix egg, sugar, marzipan, grated apple and orange flower extract together to a homogeneous mass.
  8. Roll the dough into a square of 50 x 30 cm
  9. Cut the the dough into squares of 10 x 10 cm
  10. Add the marzipan filling into the middle of the dough square
  11. Fold the dough together around the filling - fold it close together
  12. Place the bun up-side-down on the baking plate
  13. Raise the buns for another 30 minutes
  14. Glaze the buns with a whipped egg
  15. Bake at 220'C for 15 minutes in the middle of the oven (conventional)
  16. Cool down the buns before decoration with sugar glazing - unfolding your creative side :-)


As purple is one of my favourite colour, I have decided to cover my Shrovetide bun with lilac sugar glazing, so these buns can match my cloths tomorrow at work.


Home-made dark muscovado sugar ice cream


I got the task of finishing off the yearly Fish Dinner Evening for Rowers making the dessert !! After a few days in the thinking box I decided to make a dessert symphony of home-made ice cream based on dark muscovado sugar, spice plums in red wine spiced plums in red wine and caramels with liquorice.

I am BIG fan of this ice cream based on dark mucovado sugar, as it has a pleasant taste of liquorice without scaring people. I have found this ice cream recipe using muscovado sugar here: www.dansukker.dk/dk/Opskrifter/Muscovado-is_med_mandler_i_rom.

When I make home-made ice cream, I will make it more or less the same day, as you should eat it in order to avoid the creation of the BIG unpleasant ice crystals. I will maximum make the ice cream 2 days in advance again in order to avoid the BIG ice crystals.
I really dislike these large ice crystals, which you quiet often experience, when you eat home-made ice cream. And people are so prode, that they have made their own ice cream, and I can only focus on these stupid BIG ice crystals !!!! It is probably a work damage of mine.

And another good advice of mine is to make the ice cream mix the evening before, so it can cool down night over in the refrigerator before you freeze in the ice cream machine.
And the final good advice is to eat the ice cream relative soon after the creation, but this should not be a problem with great home-made ice cream :-)

Dark muscovado sugar ice cream: - 6 servings
  • 240 g dairy whipping cream with 38% fat
  • 320 g milk - 0.1-3.5% fat
  • 2 tablespoon glucose syrup
  • 150 g dark muscovado sugar
  • 8 (pasteurised) egg yolk
  1. Whip the muscovado sugar and egg yolks together in a foamy mass.
  2. Add the whipping cream, milk and glucose syrup to a cooking pot.
  3. Heat the cream-milk up to the boiling point, while you keep agitating in the cooking pot.
  4. Remove the cream-milk mass from the heat and whip in the sugar-egg yolk mass.
  5. Cold down this ice cream mix for min 4 hours.
  6. Meanwhile cool down the ice cream machine bowl in the freezer.
  7. Run the ice cream mix on the ice cream machine for 25 minutes.
  8. Place the ice cream in the freezer


February 18, 2012

Marble Cake with liquorice a la Klidmoster


I have found this recipe on marble cake with liquorice on the food blog by Klidmoster, and it was for sure the right choice for me to bake in connection with my afternoon tea with focus on liquorice. As we had quiet a large tea menu to taste, I was left with a large part of this cake. So I took the rest of this cake with me to work, so my work colleagues could finish it of. Only my Danish turned up, as my foreign work colleague still have to adjust to the Danish taste preference of liquorice !!!

Liquorice cake a la Klidmoster:

  • 250 g soft butter
  • 250 g sugar
  • 250 g cake flour
  • 4 eggs
  • 150 g milk
  • 2½ teaspoon baking powder
  • The corns of one vanilla pod
  • Zest and juice of 1½ lemon (organic)
  • 2 tablespoon of English liquorice powder
  • 1 tablespoon raw liquorice powder
  1. Whip the soft butter, vanilla corn and sugar together foamy.
  2. Add the egg, one by one, and whip in between.
  3. Add the milk, cake flour and baking powder.
  4. Stir the cake mix into a homogeneous mass
  5. Divide the cake mass into two portion, the one a little bigger than the second portion.
  6. Add the lemon zest and juice into the big portion of cake mass
  7. Add the two different liquorice powders into the smaller portion of cake mass
  8. Line the cake form with a sheet of baking paper, if you not are using a silicone form.
  9. First fill the cake form with lemon part of the cake mass
  10. Fill the liquorice cake mass on top of the lemon part of the cake mass.
  11. Stir the cake mass gentle, so you the marbling effect in the final cake.
  12. Heat the oven to 200'C (conventional)
  13. Place the cake in the lower part of the oven.
  14. Bake the cake for approx 60-70 minutes at 200'C.
  15. Check, that the cake is baked enough.
  16. Cool the cake down.

February 17, 2012

Lønnestræde´s walnut bun with rye and wheat flour


I have created this recipe on walnut buns out from two different walnut bread recipes, one from Elins walnut bread from "Hjemmebagt" and the other one from paper bag containing rye flour. And they have turned out very, very well also according to my afternoon tea guests.

I use the cheapest fermented dairy products, which I can get hold off, which is butter milk in this case. However, you can use plain thick milk, A-38 or yogurt, if you have this in your refrigerator. As sugar part you can use, what ever you have available in your kitchen cupboard such as agave syrup, honey, maple syrup or just plain sugar.

I hope you will try out my own creation of walnut buns in your own kitchen.

Lønnestræde´s walnut bun with rye and wheat flour: 16-18 buns

  • 300 g rye flour
  • 450 g wheat flour
  • 10 g yeast
  • 300 g boiling water
  • 300-350 g butter milk
  • 1½ tea spoon salt
  • 100 g walnuts - minced
  • 1 tablespoon agave syrup/maple syrup/honey
  • 2 tablespoons walnut oil


  1. Mix rye flour and boiling water together. And let it cool down, approx 1 hour
  2. Add the rest of ingredients into the cold rye mix.
  3. Knead the dough together for approx 10 minutes by hand.
  4. Lets the dough rest cold for 8-12 hours.
  5. De-gas the dough.
  6. Form buns of equal weight, so all the buns are baked similar after the baking. Or form two breads
  7. Lets the dough raise under a tea towel at approx. 45-60 minutes at ambient temperature.
  8. Heat the oven to 225'C (conventional).
  9. Place the walnut buns in the middle of the oven.
  10. Let the buns bake for 20-25 minutes. If you have formed breads, the baking time is approx 40 minutes instead of.

February 15, 2012

Liquorice Meringue Muffin


I kept trying to make a typical meringue recipe three times in a row, but every time when I had mixed the egg white and the major part of the icing sugar together, the meringue mix collapsed and turned very, very liquid !!!!! So becoming more and more desperate I finally decided to bake the meringue mix in muffin forms, filling ½ of the muffin form with the meringue. And this trial turned very positive out giving a airy meringue muffin with saturated taste of liquorice.

Also I could not keep on feeding Hannibal the Cat with all these egg yolk from my failed attempts on making meringue. Hannibal the Cat is a big fan of raw egg and/or egg yolks, but I also need to control the cholesterol intake by him.


Liquorice Meringue Muffin:

  • 3 egg whites
  • 160 icing sugar
  • 1 tablespoon salty liquorice syrup
  1. Heat the oven (conventional) to 150'C
  2. Beat the egg white firm.
  3. Whip in 3 tablespoons of icing sugar, one tablespoon at the time.
  4. Gentle stir in the rest of the icing sugar and liquorice syrup.
  5. Fill ½ of the muffin form with the meringue mass.
  6. Place the baking tray in the middle of the oven.
  7. Bake at 150'C for 30-40 minutes. 

February 14, 2012

Valentine Sparkling Cocktail


Ending Valentine´s Day with this third and final blog post of today I have decided to move away from the eatable things into the drinkable area creating this Valentine Sparkling Cocktail.
I have taken my inspiration again from typical Valnetine´s gift such as roses and jewellery, where diamonds is a girl's best friend !!! and crushed ice does have a tiny/small look-a-like with diamonds, well before they melt away.

Cheers and hope you have enjoyed the Valentine´s Day together with me in my little kitchen :-)


Valentine Sparkling Cocktail: - 1 cocktail

  • Crushed ice
  • 3/4 teaspoon Monin Rose extract
  • Sparkling wine
  1. Fill the champagne glass with crushed ice.
  2. Add the rose extract
  3. Fill the glass the sparkling wine
  4. Cheers LOVE

LOVE cupcakes


LOVE IS IN THE AIR

Today I am celebrating Valentine´s Day here on my blog with this recipe as well on LOVE cupcakes. I have translated LOVE  into the use of cherry (the lovely Amarena Fabbri cherry) and vanilla in these cupcakes.  The basic cupcake recipe is from the magazine "Cupcake Heaven".

Afterwards I have been topping the cupcake base with ready-to-use sugar fondant, which I later have decorated with various types of hearts.

When serving these heart decorated LOVE cupcakes for one of my network group at work I was a little concerned, that the male member would "refuse" to be seen eating these girlie cupcakes. However, being able to select as the first person, my male colleague had no concerns at all in both eating and enjoying the cupcakes together with a cup SWEET LOVE tea from Kusmi !!!!

LOVE Winter Cupcakes: - 12 cupcakes

  • 115 g butter - at room temperature
  • 115 g sugar
  • 115 g cake flour
  • 2 eggs - lightly beaten
  • 1 tablespoon of vanilla sugar 
  • 2 tablespoon of Amarena Fabbri cherry juice
  • 3 tablespoons of Amarena Fabbri cherries - mashed
  • 1 teaspoon of baking powder
  • Sugar fondant
  • Cake decoration
  1. Heat the oven to 180'C (conventional oven).
  2. Add the soft butter and sugar into a mixing bowl using a electric mixer.
  3. Add the vanilla sugar, cherry juice, mashed cherries and baking powder into the mixing bowl, beat everything together.
  4. Slowly add the egg, while you keep beating the cupcake mix.
  5. Use a sieve to sift the cake flour into the mixing bowl.
  6. Gently stir the flour into the cupcake mix.
  7. Fill 12 paper muffin form with the cupcake mix.
  8. Place the muffin form close together in order to lower the rising level of the cupcakes during baking.
  9. Bake at 180'C for 20-25 minutes.
  10. Leave the cupcakes to cool down.
  11. Meanwhile roll out the sugar fondant.
  12. Place the sugar fondant on top of the cupcakes and decorate with various cake decorations.
  13. Share the LOVE around you :-)

Valentine Romance Scones


ROMANCE

I am having another go at the blog event called "Tea Time Treats", which is a monthly baking challenge event managed  Karen from Lavender and Lovage and Kate from What Kate Baked. It is Kate from What Kate Bakedwhich is the host of February month. The theme for this month is off cause Romance, which I assume is coming from Valentine´s Day, turned into puddings, pies, desserts, scones, biscuits, tarts and cakes - http://whatkatebaked.blogspot.com/2012/01/february-tea-time-treats.html.


I decided to make/bake scones using a basic recipe from the cake book called "a piece of cake" by Leila Lindholm adding my "translation" of ingredients relating to Valentine´s Day / Romance. As chocolate is a typical Valentine gift, chocolate should play an important role in these scones. As the colour of Romance/heart/love is red, I also needed a red ingredients such as cherry, but not just any cherries, it should be the Amarena Fabbri cherries !!!!, which beside from their colour also gives the most wonderful cherry flavour.

I believe I can say, that my afternoon tea guests did fall in LOVE with these Valentine Romance Scones :-)


Valentine Romance Scones: - 12 pieces

  • 450 g cake flour
  • ½ teaspoon salt
  • 1½ teaspoon baking powder
  • 60 g sugar
  • 125 g cold butter
  • 1 egg
  • 2 dl milk
  • 100 g white chocolate - chopped into smaller pieces
  • 5 tablespoon of Amarena Fabbri cherries
  1. Heat the oven (conventional) to 250'C.
  2. Mix the flour, salt, baking powder and sugar together in a mixing bowl.
  3. Cut the cold butter into small pieces.
  4. Grind the butter pieces into the flour mix.
  5. Whip the milk and egg together.
  6. Mix milk-egg and flour-butter together without kneading it a dough.
  7. Add the chocolate pieces and Amarena Fabbri cherries.
  8. Place the dough on a pieces of baking paper.
  9. Flatten the dough into a height of 3 cm.
  10. Use a glass to cut out scone pieces or place the dough into heart shape silicone form.
  11. Bake the scone at 250'C for 10-15 minutes.


February 13, 2012

Liquorice Dream


I found the original recipe on the these Lavender Dream cakes in the cooking/cake book "A piece of cake" by Leila Lindholm, here they were made with lavender flower. However, as the theme for afternoon tea was liquorice, I decided to exchange lavender with two types of liquorice powders.

If you addicted to liquorice as I am, you should find the strength of liquorice to be good/high. However, you could also find, that the liquorice flavour has into a burned flavour direction, which my tea guests did. So really consider to only use ½ the dosage of the two liquorice powders.

I will later on try out the original recipe using lavender flower as I am flower power girl. So my good girl friend in Horsens should watch out for these Lavender Dream, as they could give her yet another nightmare involving lavender.


Liquorice Dream: - 20 pieces

  • 100 g butter - soft
  • 110 g sugar
  • 160 g cake flour
  • 1/4 teaspoon ammonium bicarbonate
  • 2 teaspoon English liquorice powder
  • 1 tablespoon raw liquorice powder
  1. Heat the oven to 170'C (conventional oven)
  2. Mix the soft butter and sugar together into a homogeneous mass
  3. Add the ammonium bicarbonate and liquorice powder into this butter.sugar mass
  4. Add the flour into the mass as well, the cake mass will now look like a crumble mass
  5. Form this cake mass into small buns. Place them on baking paper.
  6. Bake the liquorice Dream at 170'C for 15-20 minutes.
  7. Cool down and store them a cookie tin/glass
  8. Enjoy together with a cup of coffee/tea.

February 12, 2012

Afternoon tea with focus on liquorice


This afternoon I will be serving afternoon tea for two good friends, where the focus will be on liquorice, actually a lot of liquorice, and a little bit of Valentine Romance. Already now people working within the health care will start to see major health problems in form of increased blood pressure from this intake of liquorice. However, we as Danes needs to increase/adjust our blood pressure in order to survive the depressing winter season with reduced sun light !!!!
My foreign working colleagues were very disgusted, when I shared this afternoon tea menu with them, they simply DO NOT understand the Danish pleasure of liquorice.

When Hannibal the Cat noticed, that I was laying out the tea table, he decided to join in being an important part of the decoration. One of my two tea friends is suffering from allergy against animals, so he is a very special good friend of Hannibal the Cat, who always concentrate his attention on him.

The menu for this afternoon tea is:


I am first publishing this post, when my tea guests are arriving, as I know they are regular readers, so I would like to keep the menu a secret until they are actually in-side my kitchen. And I will be sharing all the different recipe in the coming days.
We have a saying here in Denmark: When the cat is washing their fur, you will get guests. Yes, it is true :-)

February 10, 2012

Tea tasting at Simply Tea


What did you learn in tea school (today) ? 

We have a Danish song, where the sentence "what did you learn in school today ?" is repeat over and over again.

In beginning of February I went to tea school together with some good tea friends of mine having a tea tasting session at Simply Tea in Århus. The school leader is Alexis Kaae, the owner of Simply Tea.

So what did I learn in tea school ?
  • Use the correct water temperature for your tea - depends on the tea type - temperature between 40-100'C. 
  • Use soft water = water with a very low calcium content. So buy "soft" bottle water for white, green and yellow !!! Black tea should be OK with more hard water which means I still use the tap water in my kitchen, as I black tea drinker.
  • You can re-use high quality tea between 4-8 time, just adding new water into the tea pot.
  • Green and white tea energise you, while black tea calms you. Perhaps this is the explanation, why I such a big fan of black tea, as I have enough energy on my own.
  • I really dislike Japanese tea due to the strong flavour of spinach.
  • The white, yellow and green tea is too sophisticate for my taste buds. I personally prefer the more "plain" flavour of black tea, and addition of various flavouring oils like in Earl Grey is just perfect for me and my tea pot.


A part of the tasting session was afternoon tea meal should be served as well. As I came directly from work, I had not eaten any evening meal, so I had some expectation about this afternoon tea meal being my evening meal.

Yes, we were served egg sandwich and salmon sandwich, scones with whipped cream and jam, macaroon made with green tea. And finally a cookie containing Earl Grey.
However, the amount of food a little low in my opinion, if you have had no evening meal.

I went home a tin of white tea flavoured with jasmine flowers, as I am flower power girl :-) I will keep you posted on, how I evaluate this tea.


February 09, 2012

Product test 6 - Urtekram dinner kit Morocco meal


I have been taking another step towards the finishing line trying the entire range of dinner kits from Urtekram, the first being whole grain lasagna and the second being chicken with cinnamon and curry . And the third box tested in my kitchen is Morocco meal made with yet another portion of chicken, as I could not find any fresh lamb in the supermarket. For me the suggestion of using pork meat is not the best recommendation having the idea of Morocco in mind !!!

I used a mix of tomatoes, squash and carrots as vegetable in this dish. And again I find he entire cooking time of 20 minutes after addition of the vegetables is too long, if you prefer NOT to have over-boiled vegetable. So here I would suggest 15 minutes instead of.

For me Morocco food is interesting flavour combination of lemon, mint, raisins and cinnamon. This dinner kit is NOT fulfilling these expectation of mine, the flavour is not really there as all, just being very boring.

Asking myself again, would I pay full price for this Morocco meal dinner kit ? And again my answer would be NO.

LinkWithin

Related Posts Plugin for WordPress, Blogger...